I recently finished building a pair of bedside tables in a stlye I've used a couple times before. This post is about the project and the process I used to do it.
Why?
It's certainly not to save money. One reason is that it's fun to have projects. The other reason is that I can decide exactly what dimensions and features I want, rather than shopping around and settling for something else, and I think the steel frame ends up being a lower material cost and lower effort than using more wood. And If I'm being completely honest, a big reason is simply this: Melting metal with electricity is a rush.
Caveats
I'm going to talk about what I did here. You should not infer from this that I have any idea what I'm talking about, and I'm not going to try to make a tutorial. Especially when it comes to welding, I am a complete noob. I've done this a few times now, and it works for me, but someone who knows what they are doing may well say I'm doing it all wrong. I learned everything I know about welding from...well, basically two youtube videos. If you read this andthink, "wow I can't believe he did it like that", feel free to reach out and tell me how I should have done it better!
The bedside tables
Let's just start with some photo of the final products, shall we? That way everyone knows what I'm talking about.
I built two of these this summer. I like the double level table top, because it allows for including power outlets in a more out-of-the-way location, and for keeping books and such on the bottom, while leaving the top relatively uncluttered for storing a phone, or grabbing a glass of water in the middle of the night.
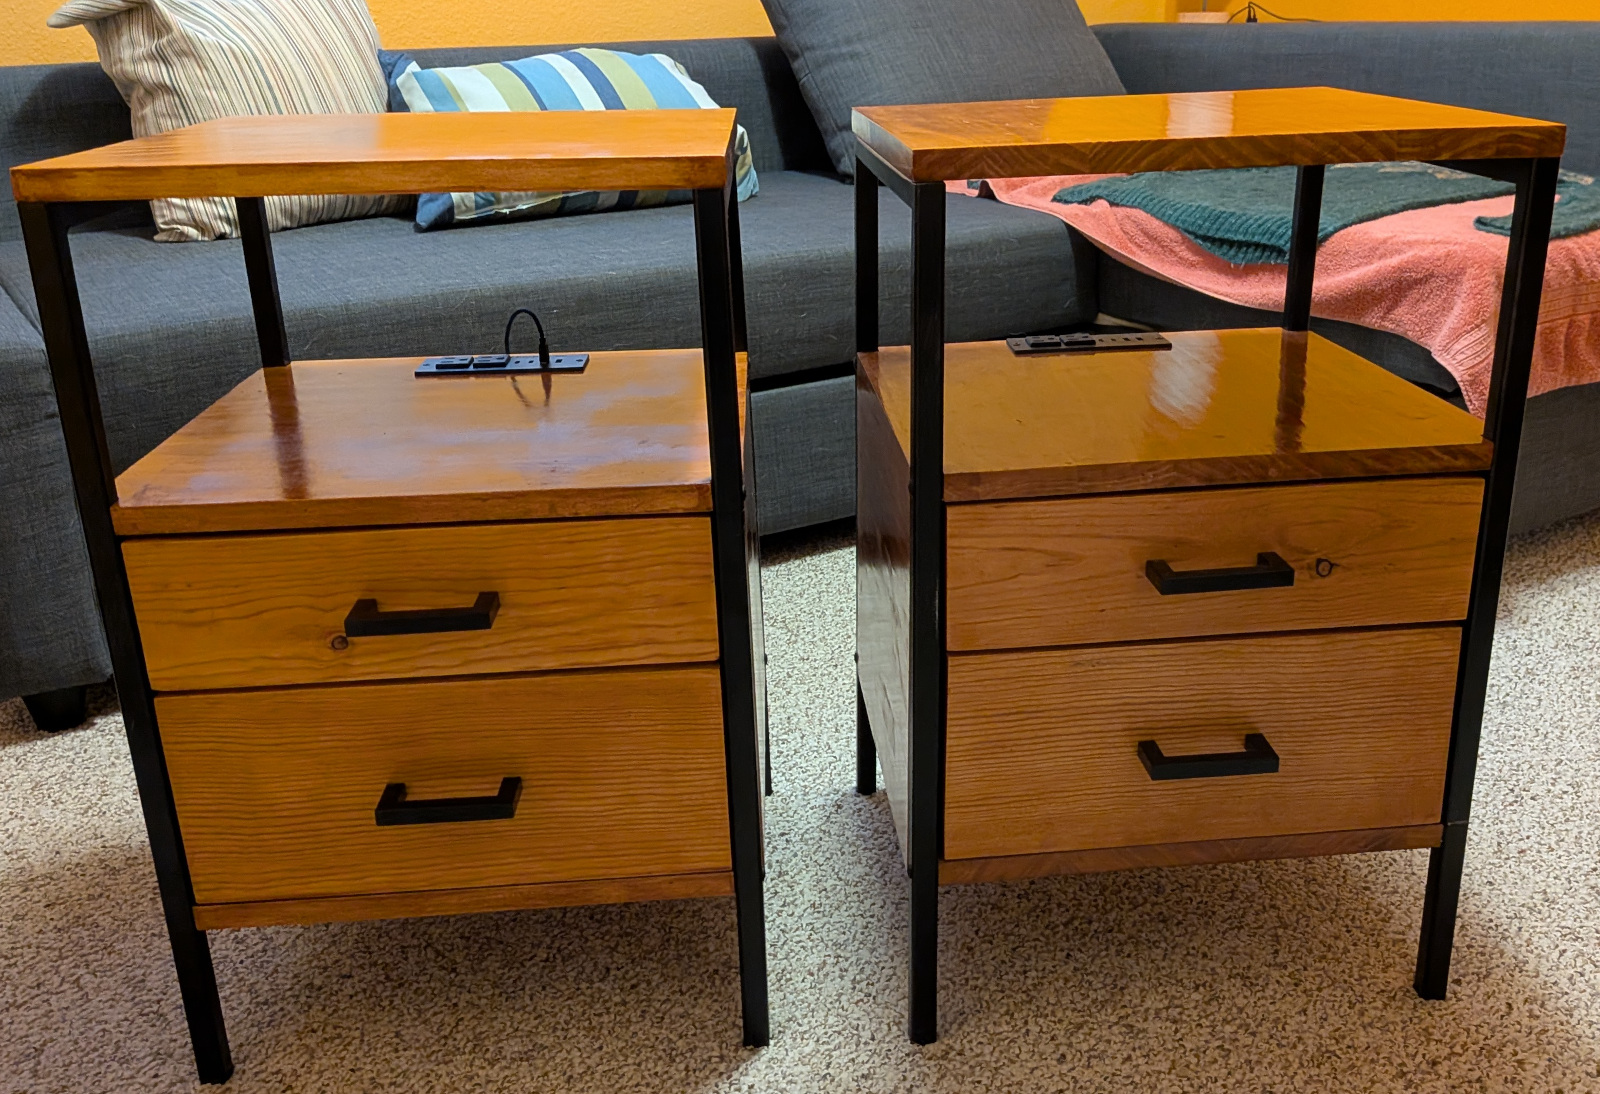
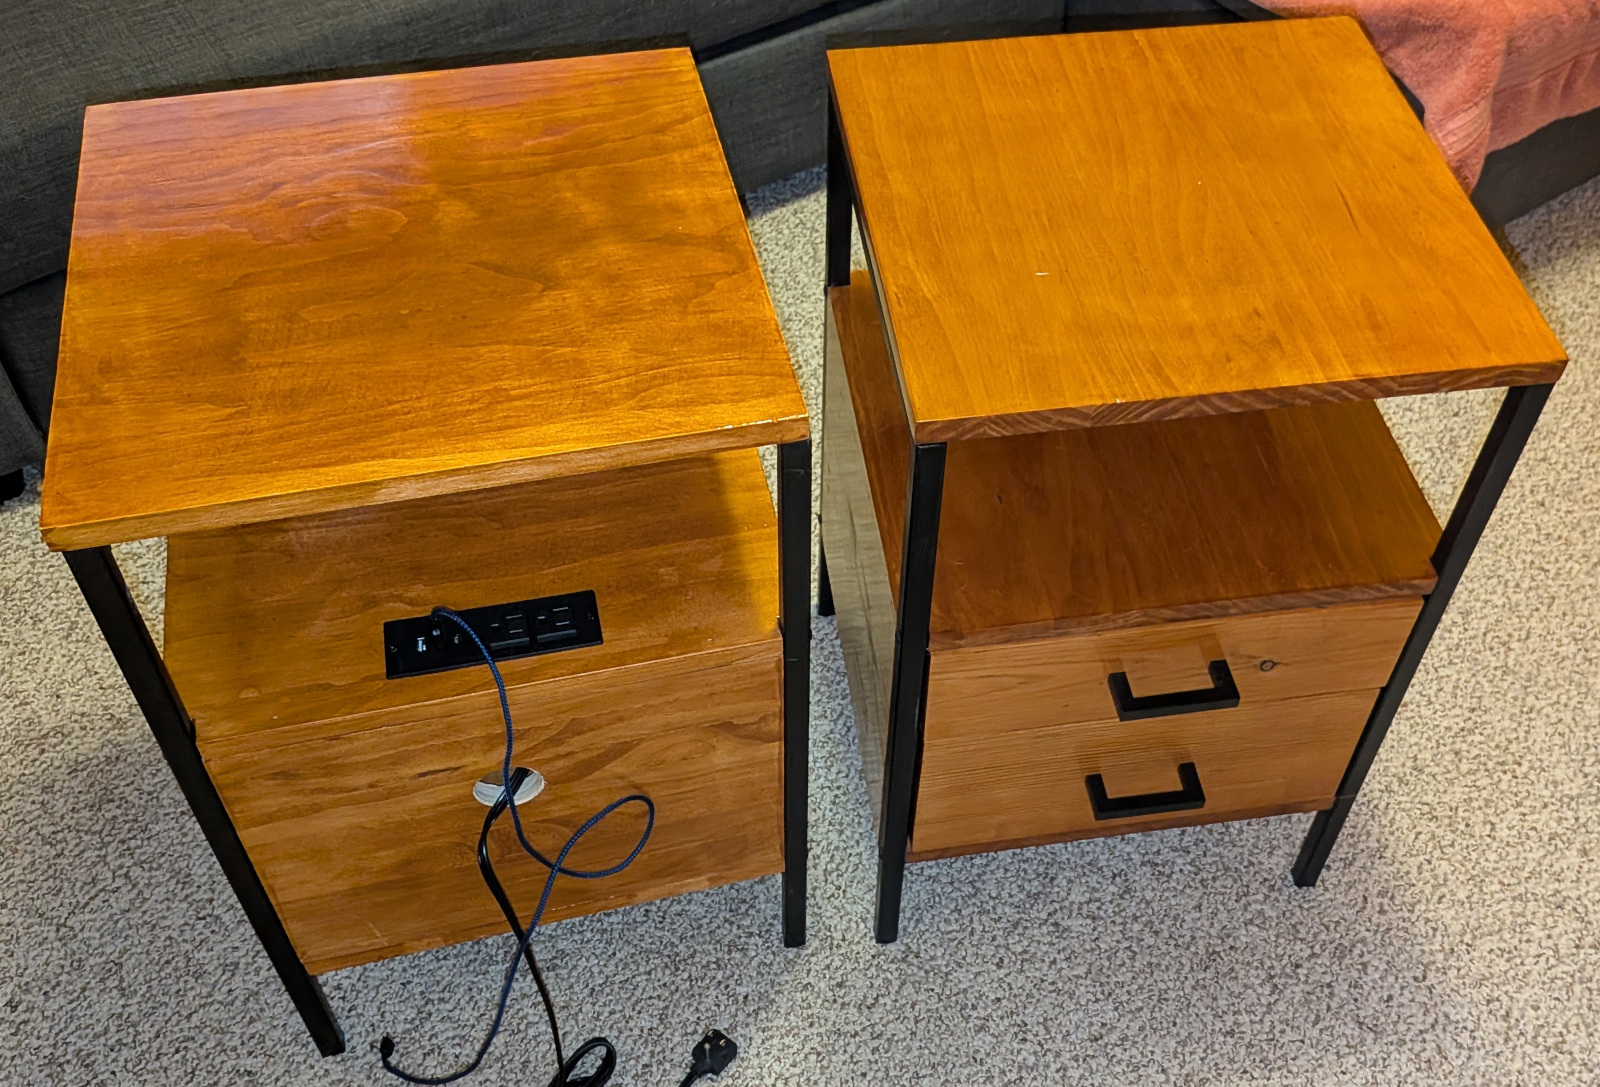
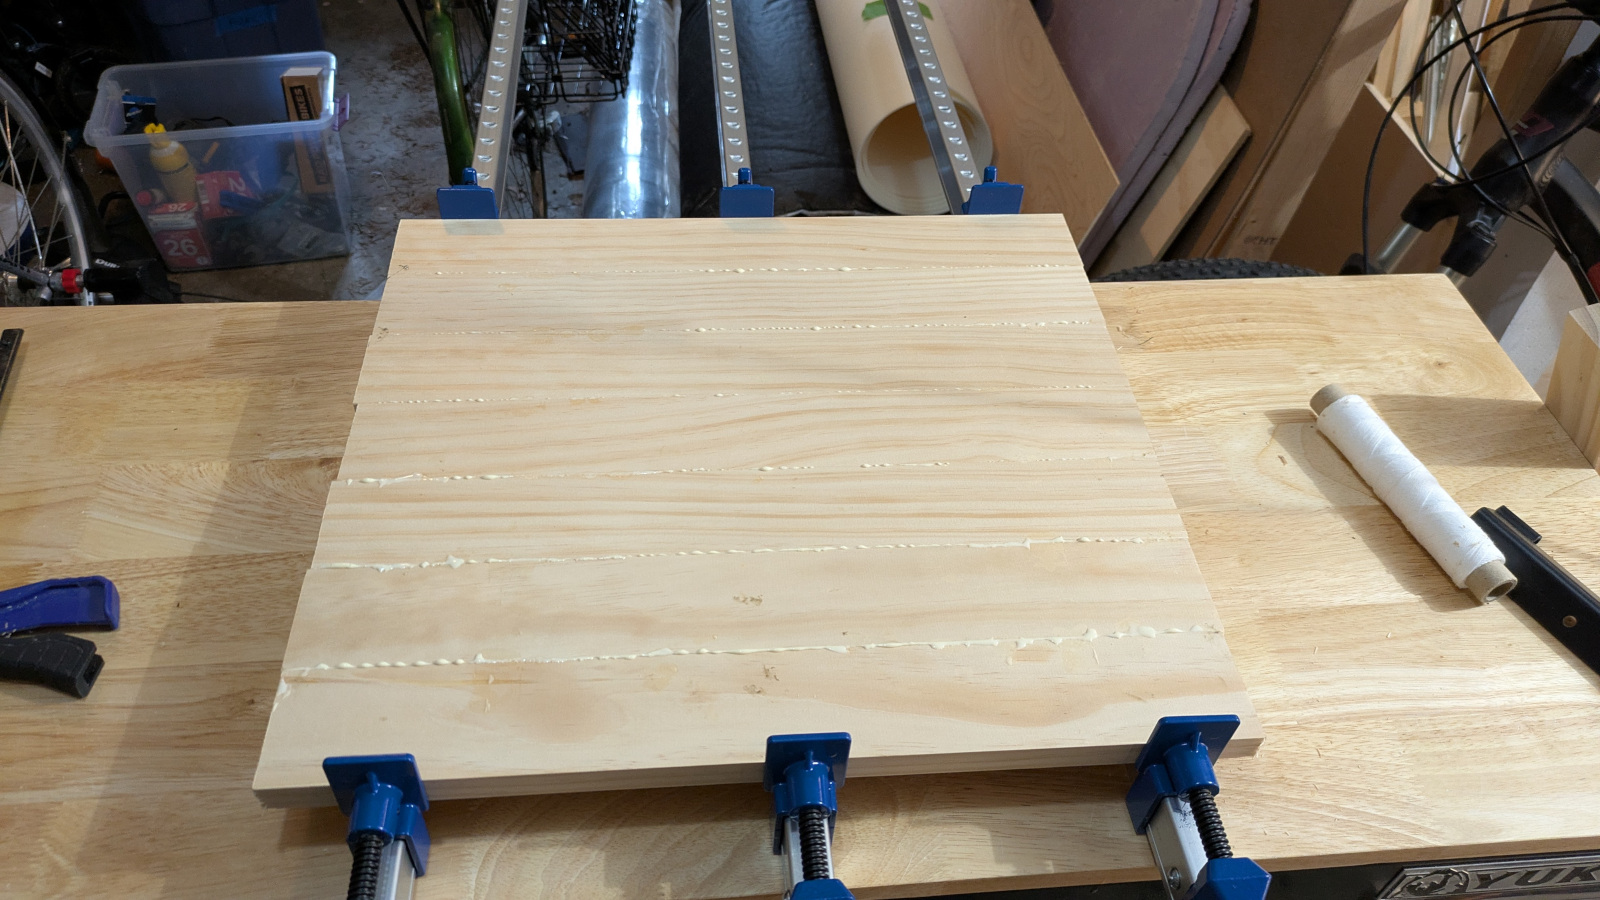
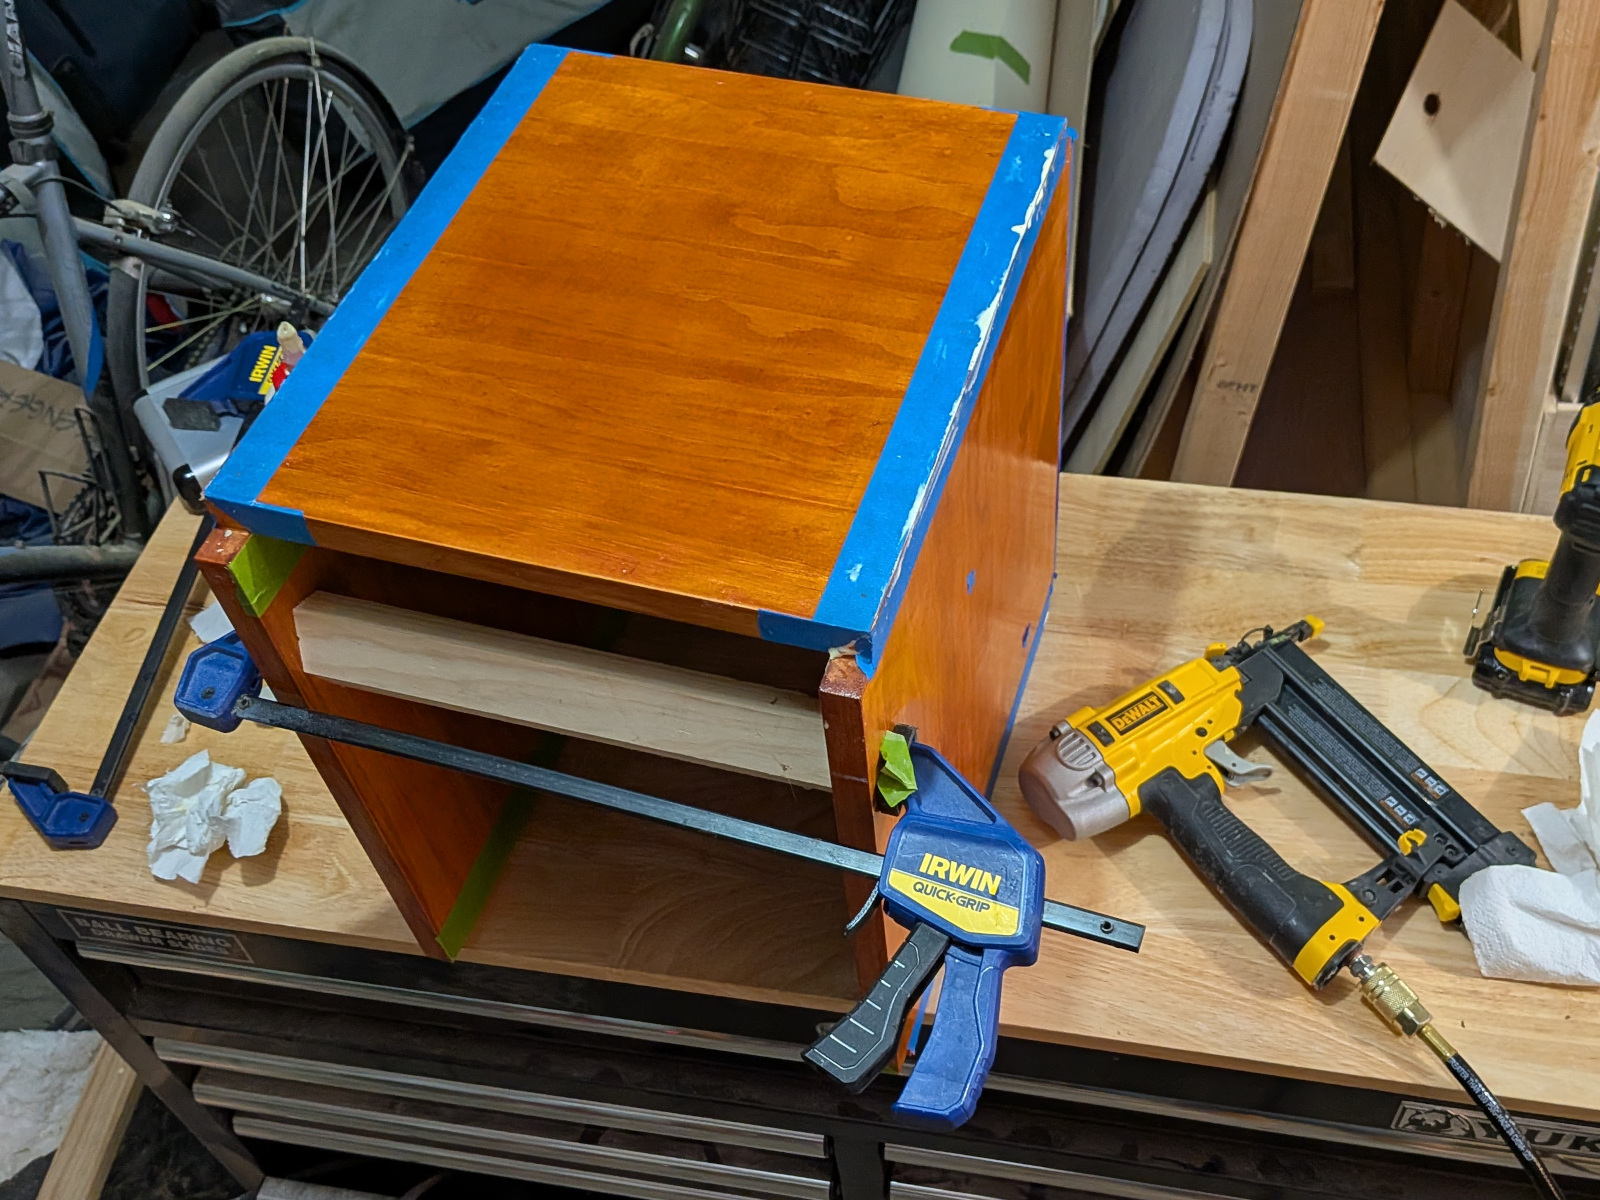
These are built from 3/4" square steel tubes welded together and painted black, and from 1x2 or 1x3 pine boards glued into panels. The drawers are built from single boards for the face, and 0.5" plywood for the sides, with 0.25" plywood bottoms.
Getting the steel
For these, I used 16ga red oxide square tubes from steelsupplylp.com. They will cut it to desired lengths for you for a very reasonable price, which is great because then I don't have to cut it, and it makes the size reasonable for shipping. They say they cut to a 1/8" accuracy, but every time I've ordered they've been more accurate than that (accurate enough that they seem perfect for my purposes).
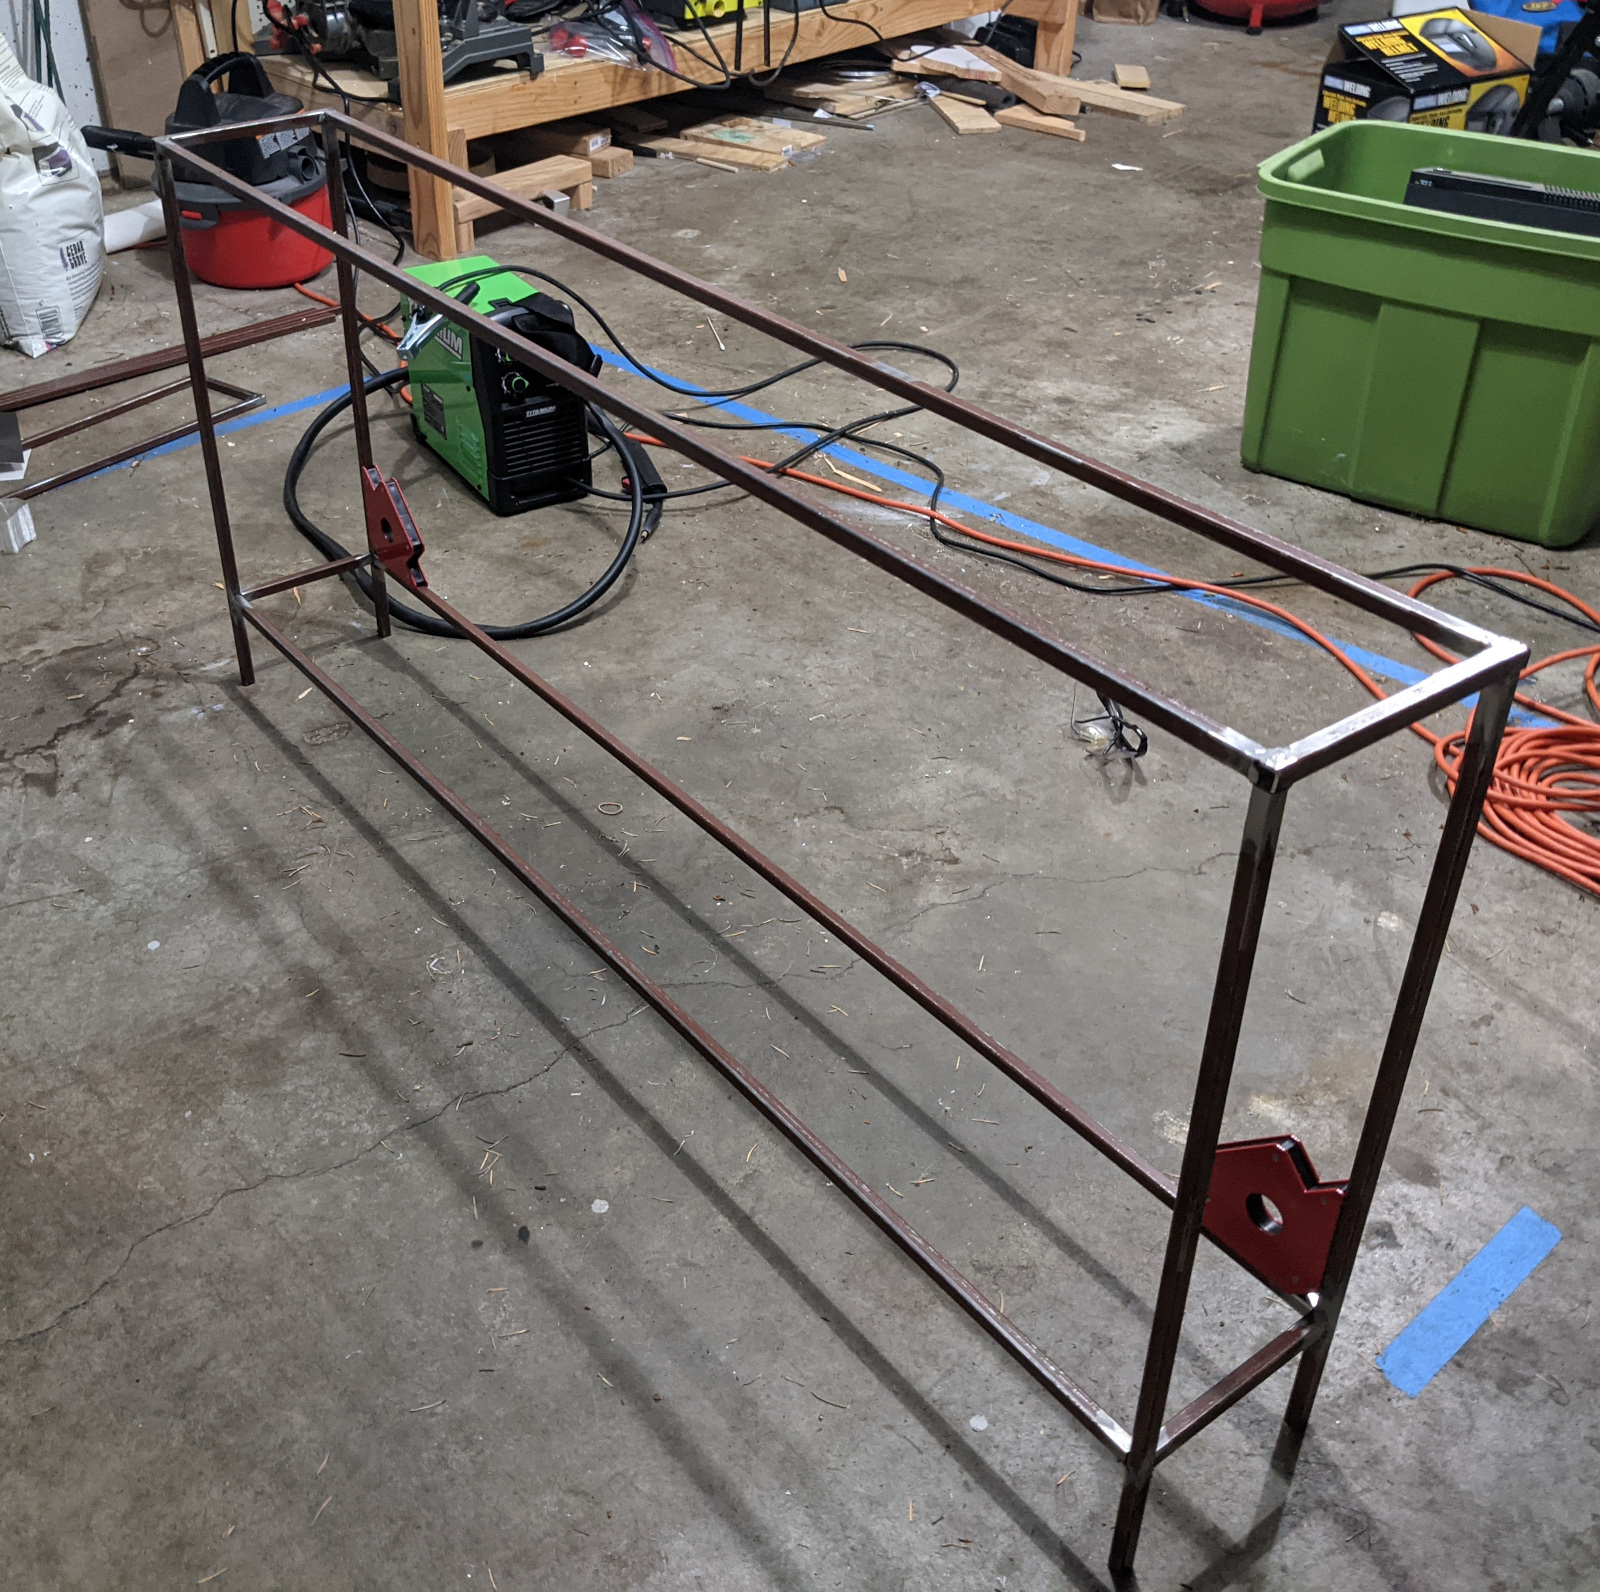
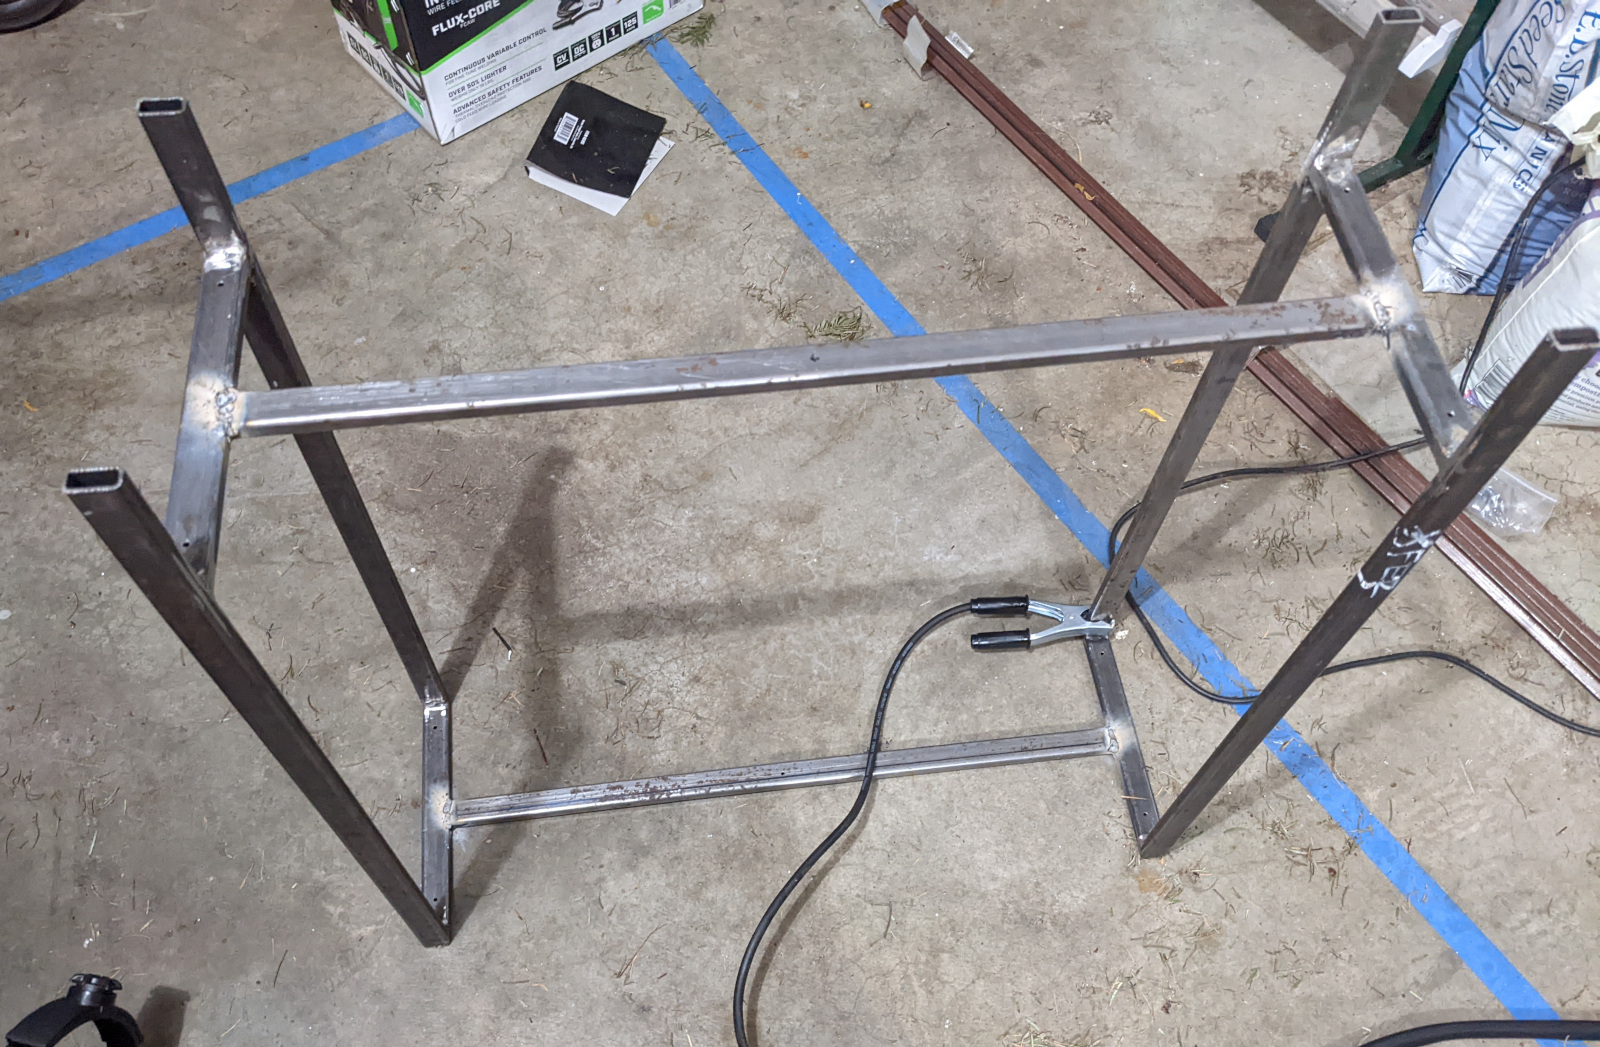
Welding
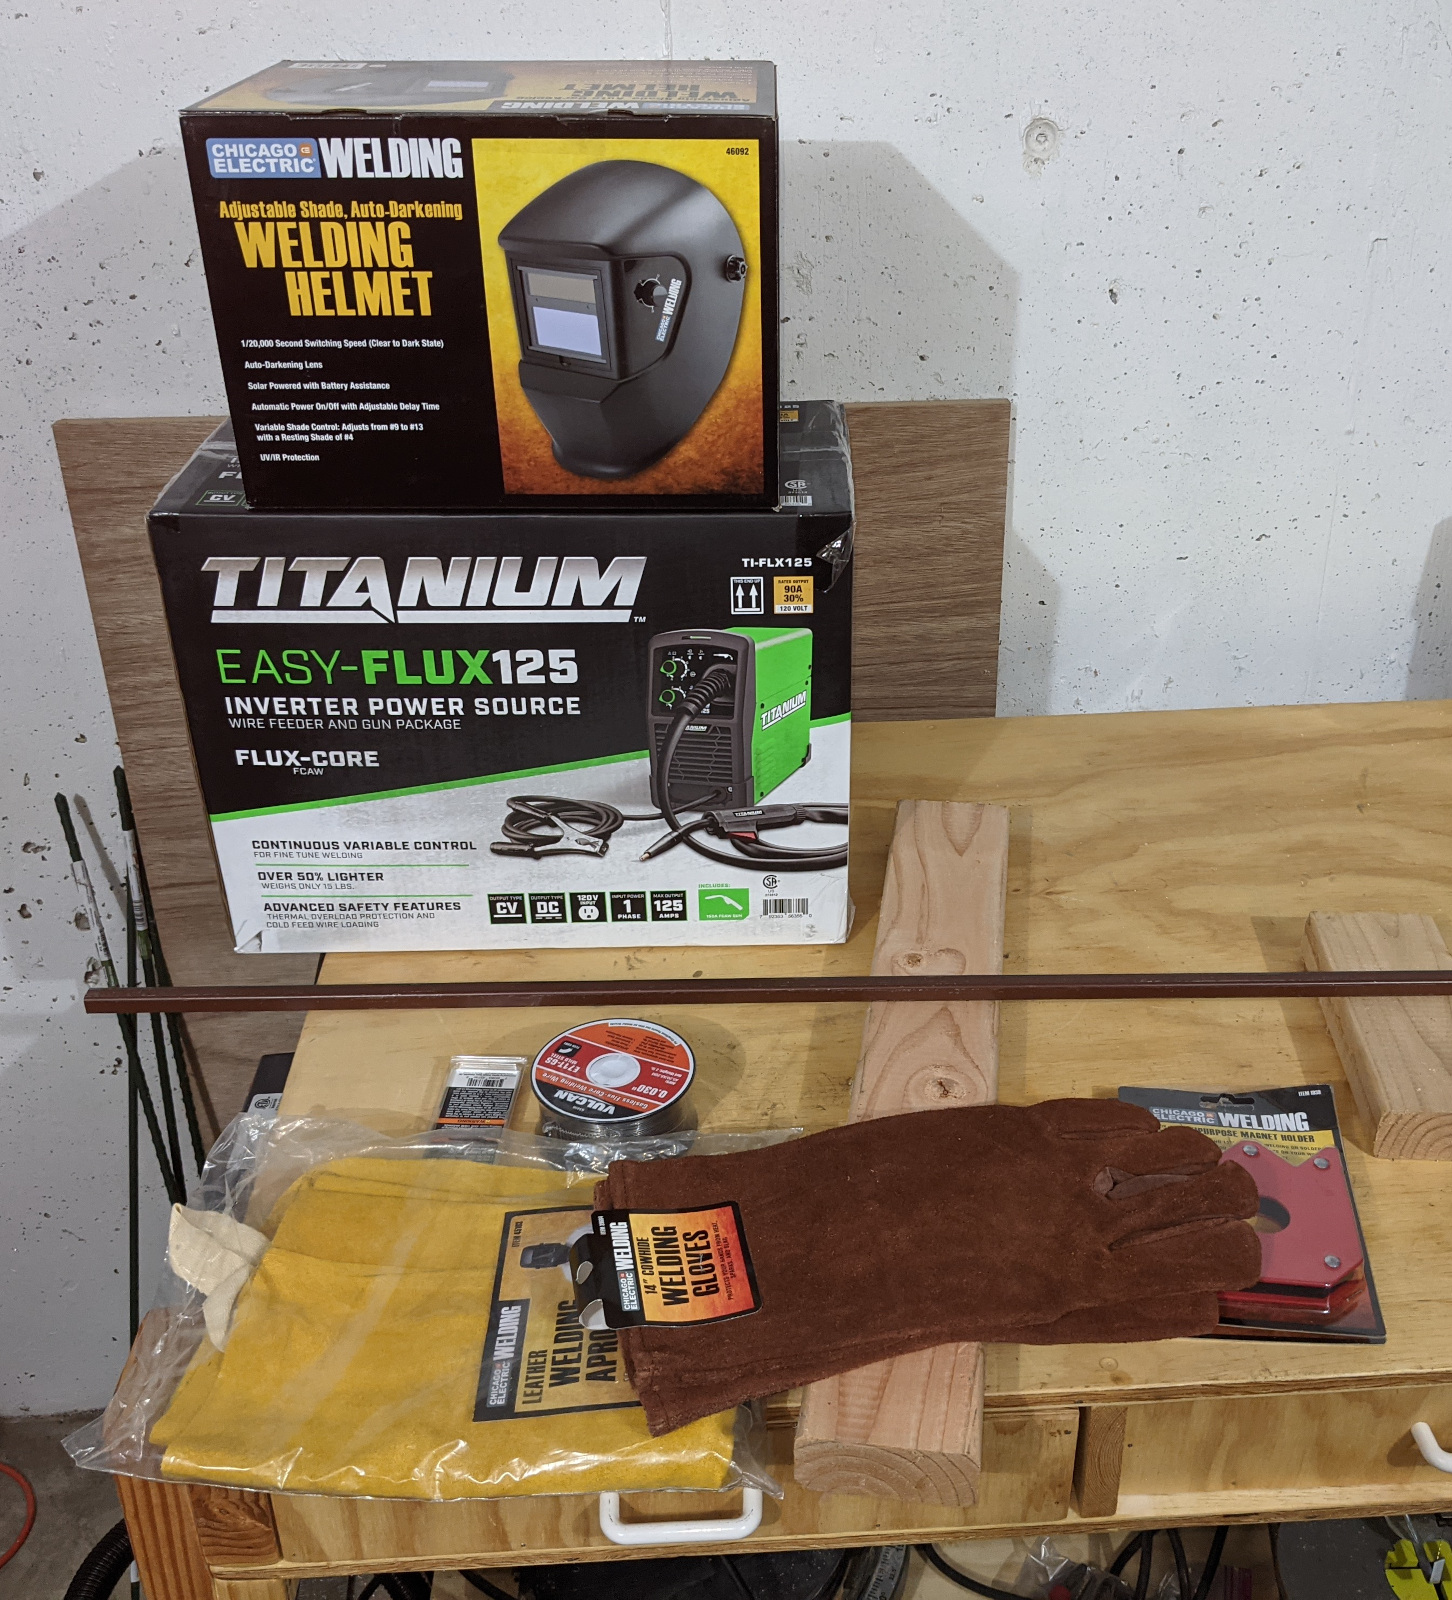
After doing some reading, and watching some youtube videos, I decided that the cheapest way to achieve what I wanted was to go to Harbor Freight and buy a cheap flux-core arc welder (FCAW). Some other gear is also critical, e.g.:
- Big gloves to insulate and protect our hands from the flying molten metal
- Thick, heavy clothes to cover your skin -- again to protect from the flying molten metal. No really. I melted many holes in the synthetic fleece I wore the first time. Liquid metal goes all over the place. You need protection. Also probably a good idea not to do it around things that catch on fire easily.
- A face mask for skin and eye protection. Also because flipping your face mask up and down as you work is part of what makes welding cool and fun. You need one of these.
- A leather apron helps cover more of your clothes -- molten metal again...
- I found these magnetic right angle jigs to be super useful for holding things in place while you tack them.
- An angle grinder. You will want to grind those horrible blobby welds you made down to something a little more smooth and presentable. "An angle grinder and paint make me the welder I ain't", they say.
The first time I did this, I did a test weld. It looked terrible, and it broke immediately under strain. I did 10 more, and they got much better. Am I good? No. But steel is strong, and I'm making simple tables, so mediocre will do here. If you're about to do this for the first time, I definitely recommend having some extra scrap tubes to practice on first. There are two adjustments on the welder: Wire feed speed and current. I found that I had to go pretty low on the current for these thin walled tubes, or else I ended up just blowing holes into the steel wall rather than welding them together.
I'm not going to try to teach anyway how to weld because I suck at it and there are better resources. All I will say is that this is, in my opinion, totally worth trying. I cannot properly explain just how satisfying it is to melt two pieces of metal together.
Wood
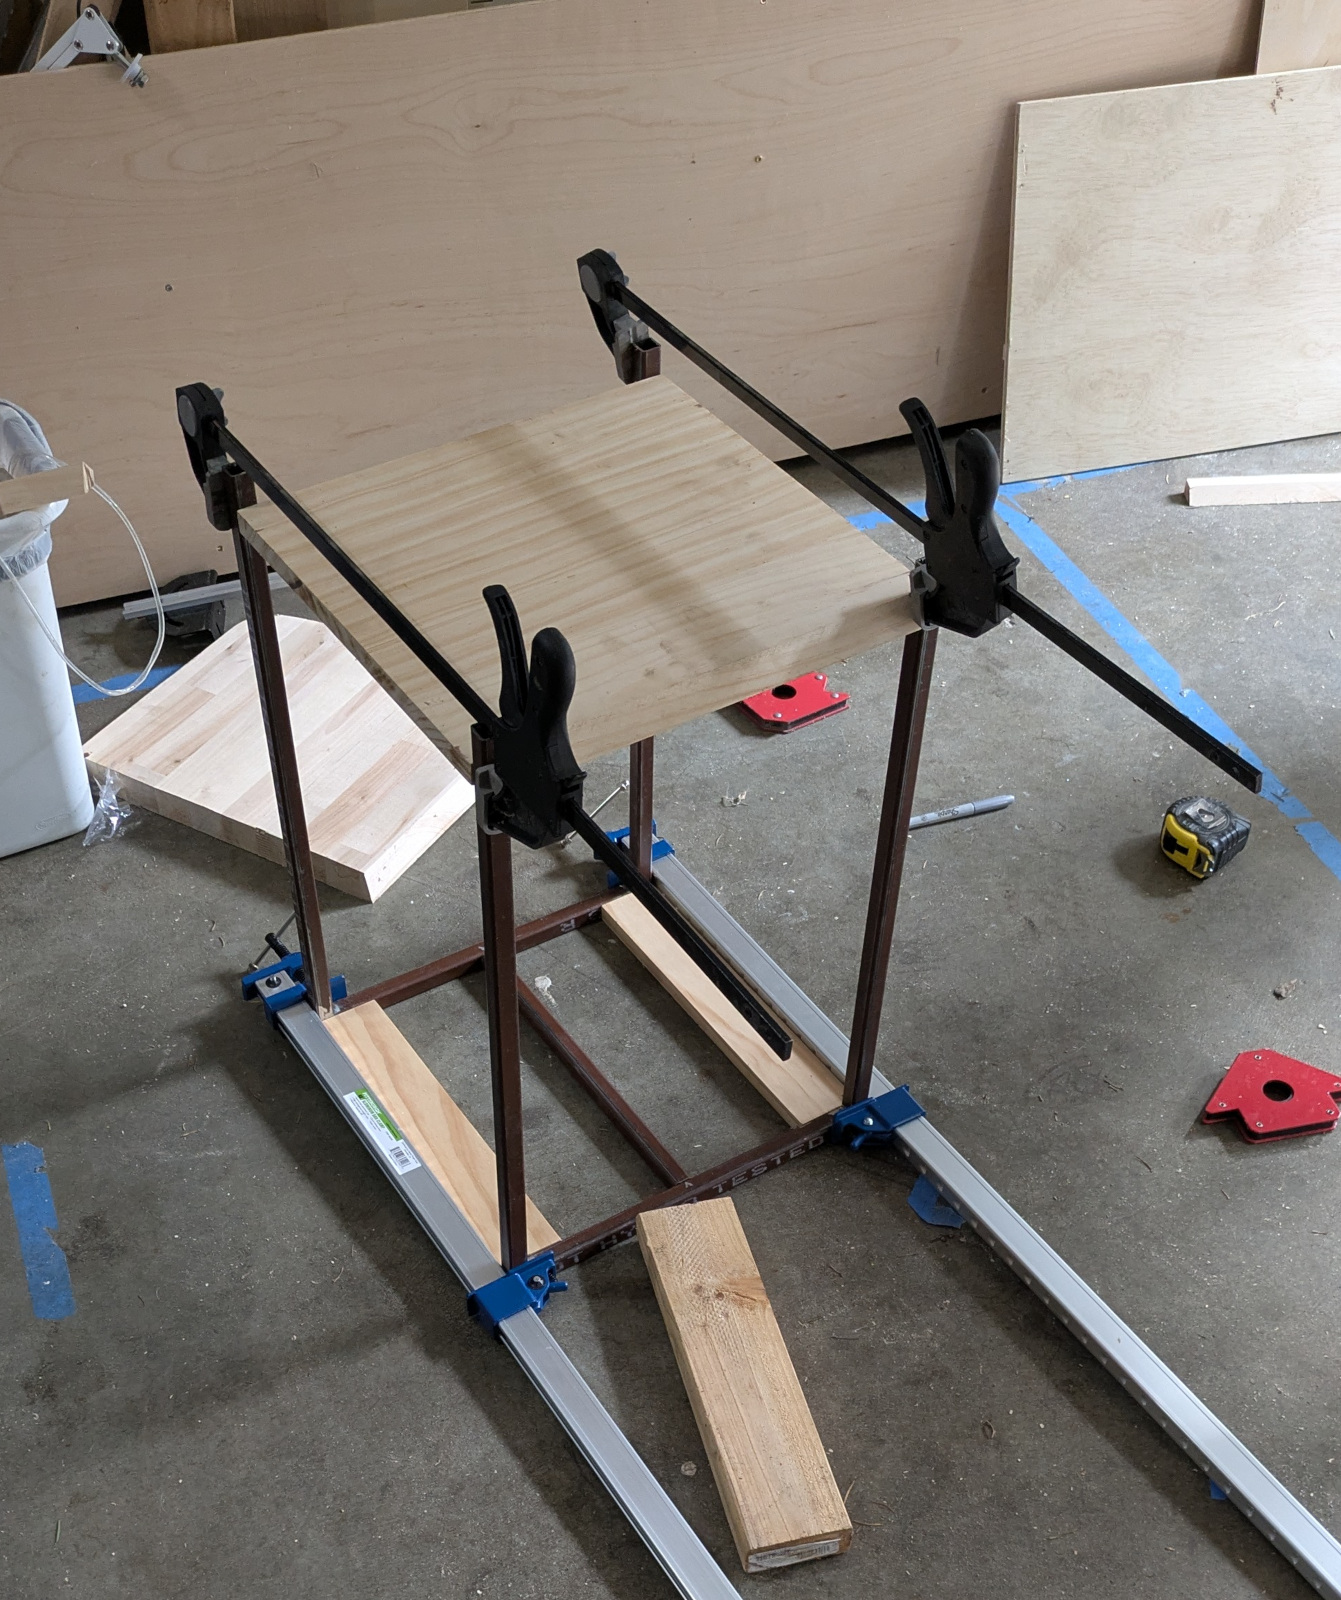
I ought some 1x3 "select pine" boards from home depot. For the second table, the 1x3's were out of stock, so I went with 1x2 boards. These I glued up into panels for the table top, and for the five sides of the box. I built the two tables in series, rather than parallel, and so the process on the second evolved somewhat. Mainly, I finished the wood panels and installed drawer slides before gluing them into the box, and I built the box first and used it as a jig for doing the steel tube assembly.
Drawers are made from some 0.5" ply, 0.25" ply (bottom) and 1x8 board (face) I had lying around as scrap.
Painting
After welding, and grinding the joints down flat with the angle grinder, I paint the metal with Rust-oleum flat black spray paint. Two coats, plus maybe a bit of touch up if I missed any spots.
For the wood, I used Minwax Polyshades, with a satin finish. It seems to be pretty good. I've tried a couple others in the past, and these is easy to apply (rather than stain + poly later) and it holds up well to water and abuse. I do really struggle with getting an even coat, and avoiding drips. I suspect this is just bad technique though.
BOM and Material Cost
| Descrpition | Source | Price (per table) |
|---|---|---|
| 288" 0.75" 16ga tube | Steel Supply LP | $29 (shipped) |
| Select pine boards | Home Depot | ~$96 |
| Drawer Slides | Amazon | $13 |
| Handles | Amazon | $7 |
| Recessed Power Strip | Amazon | $34 |
| Plastic feet | Amazon | $5 |
| Total: | $184 |
Not including a bit of 1x8 board and plywood that I used scrap for.
Other Tables
This is actually the third project since I bought the welder. First I built these...
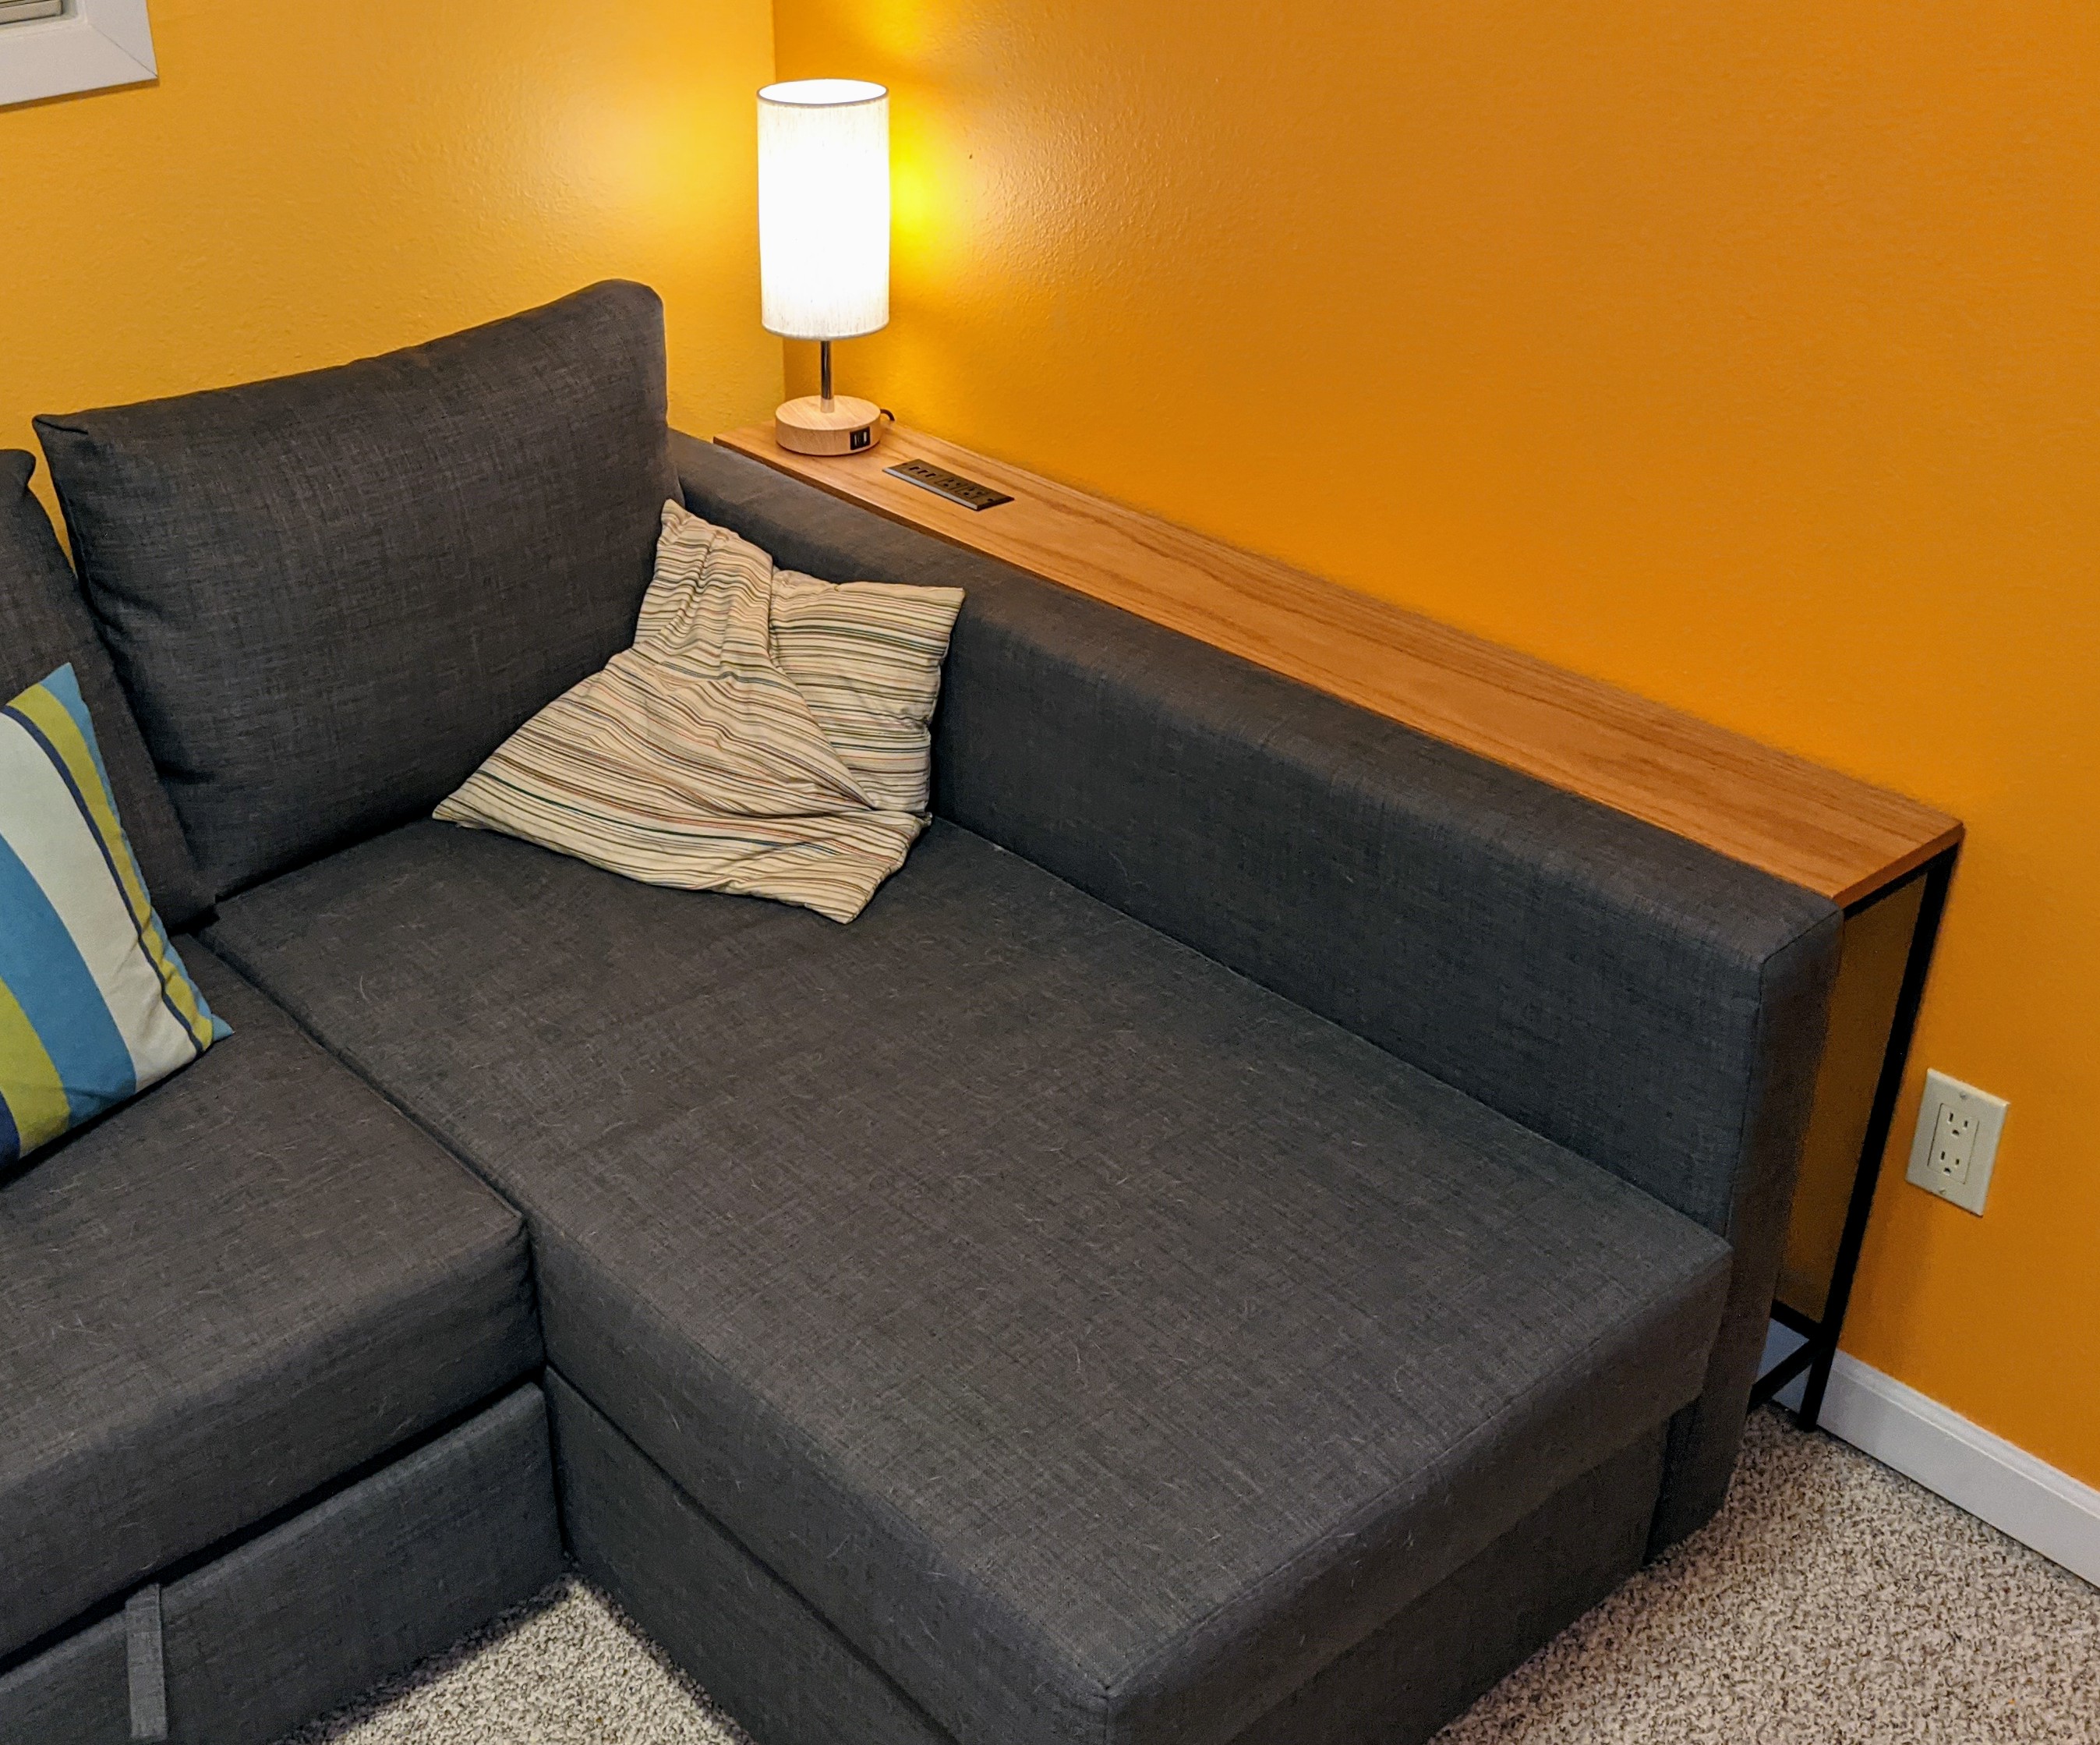
Couch End Table
We have a convertible couch in our guest room, and I wanted a narrow table to go between it and the wall. It's main use is as a place to sit and read, or if we have guests, a pull out bed. So, it needed a place to put a drink, a lamp, and to charge devices. I really wanted the lenght of it to match the couch.

End of hall table
This one is just a bit of extra storage, and to decorate the blank end of our hallway. I found a peice of this wormwood board at a reclaimed furniture store and used that for the table top. Very simple construction with just a steel frame, and a couple of boards screwed onto that. The worst part of this one was getting stain into all those holes with a q-tip -- that was a tedious job!

Some more process photos
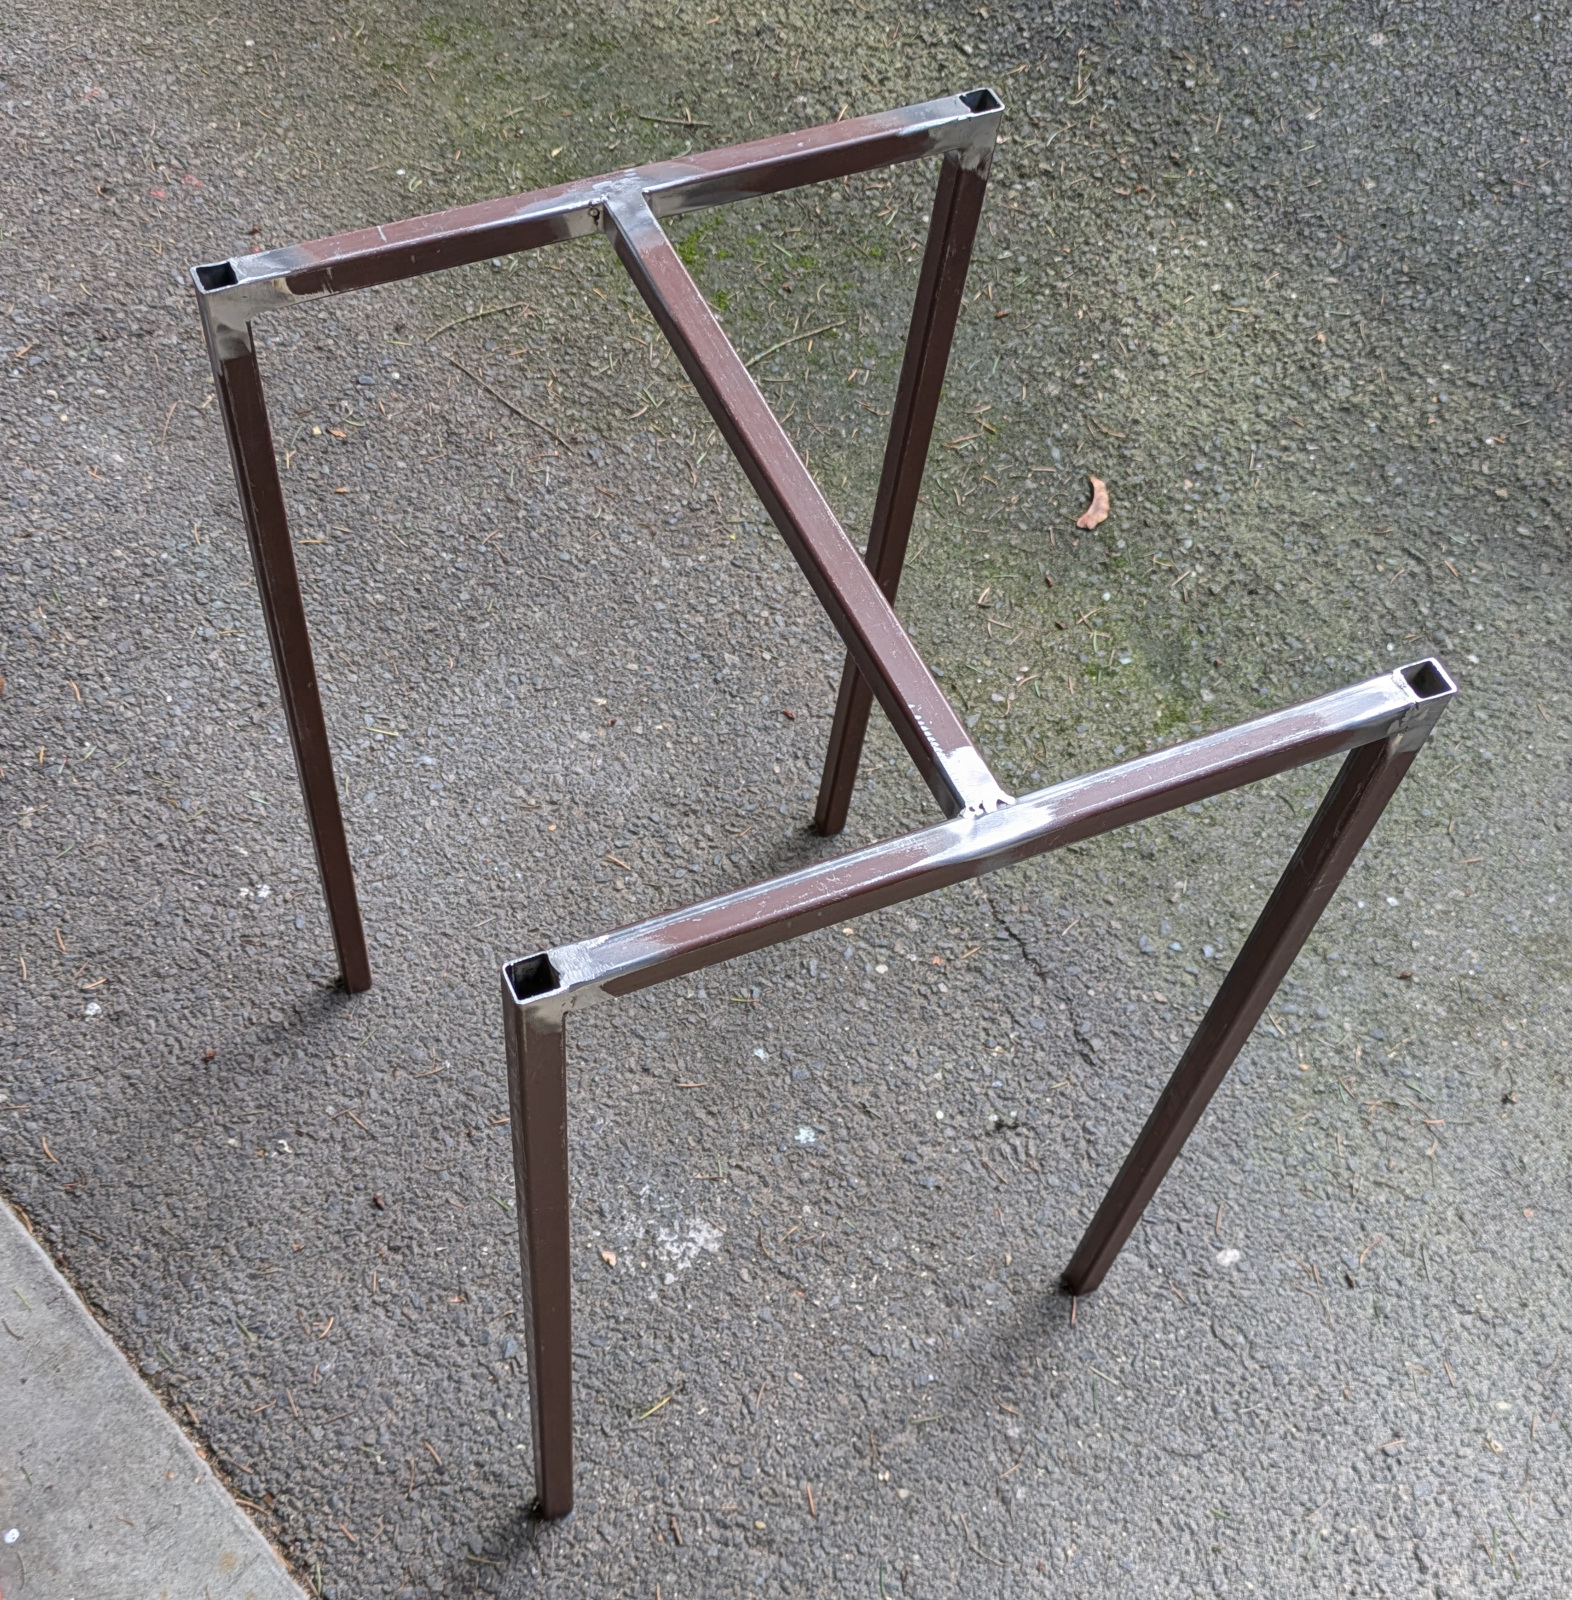
To wrap up, here's a random assortment of build photos...