How to Build a Reflow Toaster
Introduction
I use my toaster oven pretty regularly for other things, but I actually only rarely use it for reflow. If you just want to reflow boards effectively, consider purchasing a cheap reflow oven, like the T962. It can be difficult to achieve a good profile with a toaster, especially without forced air inside.
Also, consider that my project uses the ESP-IDF, and requires some knowledge about how to setup the toolchain for the Xtensa as well as for building the node UI project. If you're new to embedded software, there are some other projects based on the arduino IDE that are likely to be easier for you to get started on.
Using a toaster oven for DIY reflow is certainly not a new idea, but until recently I’d never done my own! I’ve been designing and building PCBs for well over a decade; but I’ve always either assembled them by hand — when the footprints are not too daunting — with an iron and the occasional hot air, or more often paid to have them professionally assembled. However, I have a project with some fine-pitch parts and pads underneath that I’m trying to do “on the cheap”, so I decided I would setup my own DIY toaster oven reflow to build those, and get some first-hand experience with reflow soldering.
As so often happens, getting everything wired up is quick, and then the software work begins. Getting a basic temperature controller up and running mostly meant porting a driver for the OLED display based on Arduino to work with the ESP-IDF framework I prefer, and writing a driver for the MAX31855K. Getting to the point of controlling temperature was pretty quick. Most of the development time went into the UI; first rendering the OLED status display, and then creating an HTTP API and a React UI in javascript to do things like editing profiles and graphing the temperature over time.
I had intended to put everything in a box, and add some panel-mounted buttons for basic control, for example to select the profile and start/stop a run, but for more complicated things like editing the profiles I really wanted a more powerful interface like the browser to do it. I may go back and add the buttons still at some point, but I’ve actually been quite happy so far controlling it entirely via the browser.
Step 1: Assembling the parts
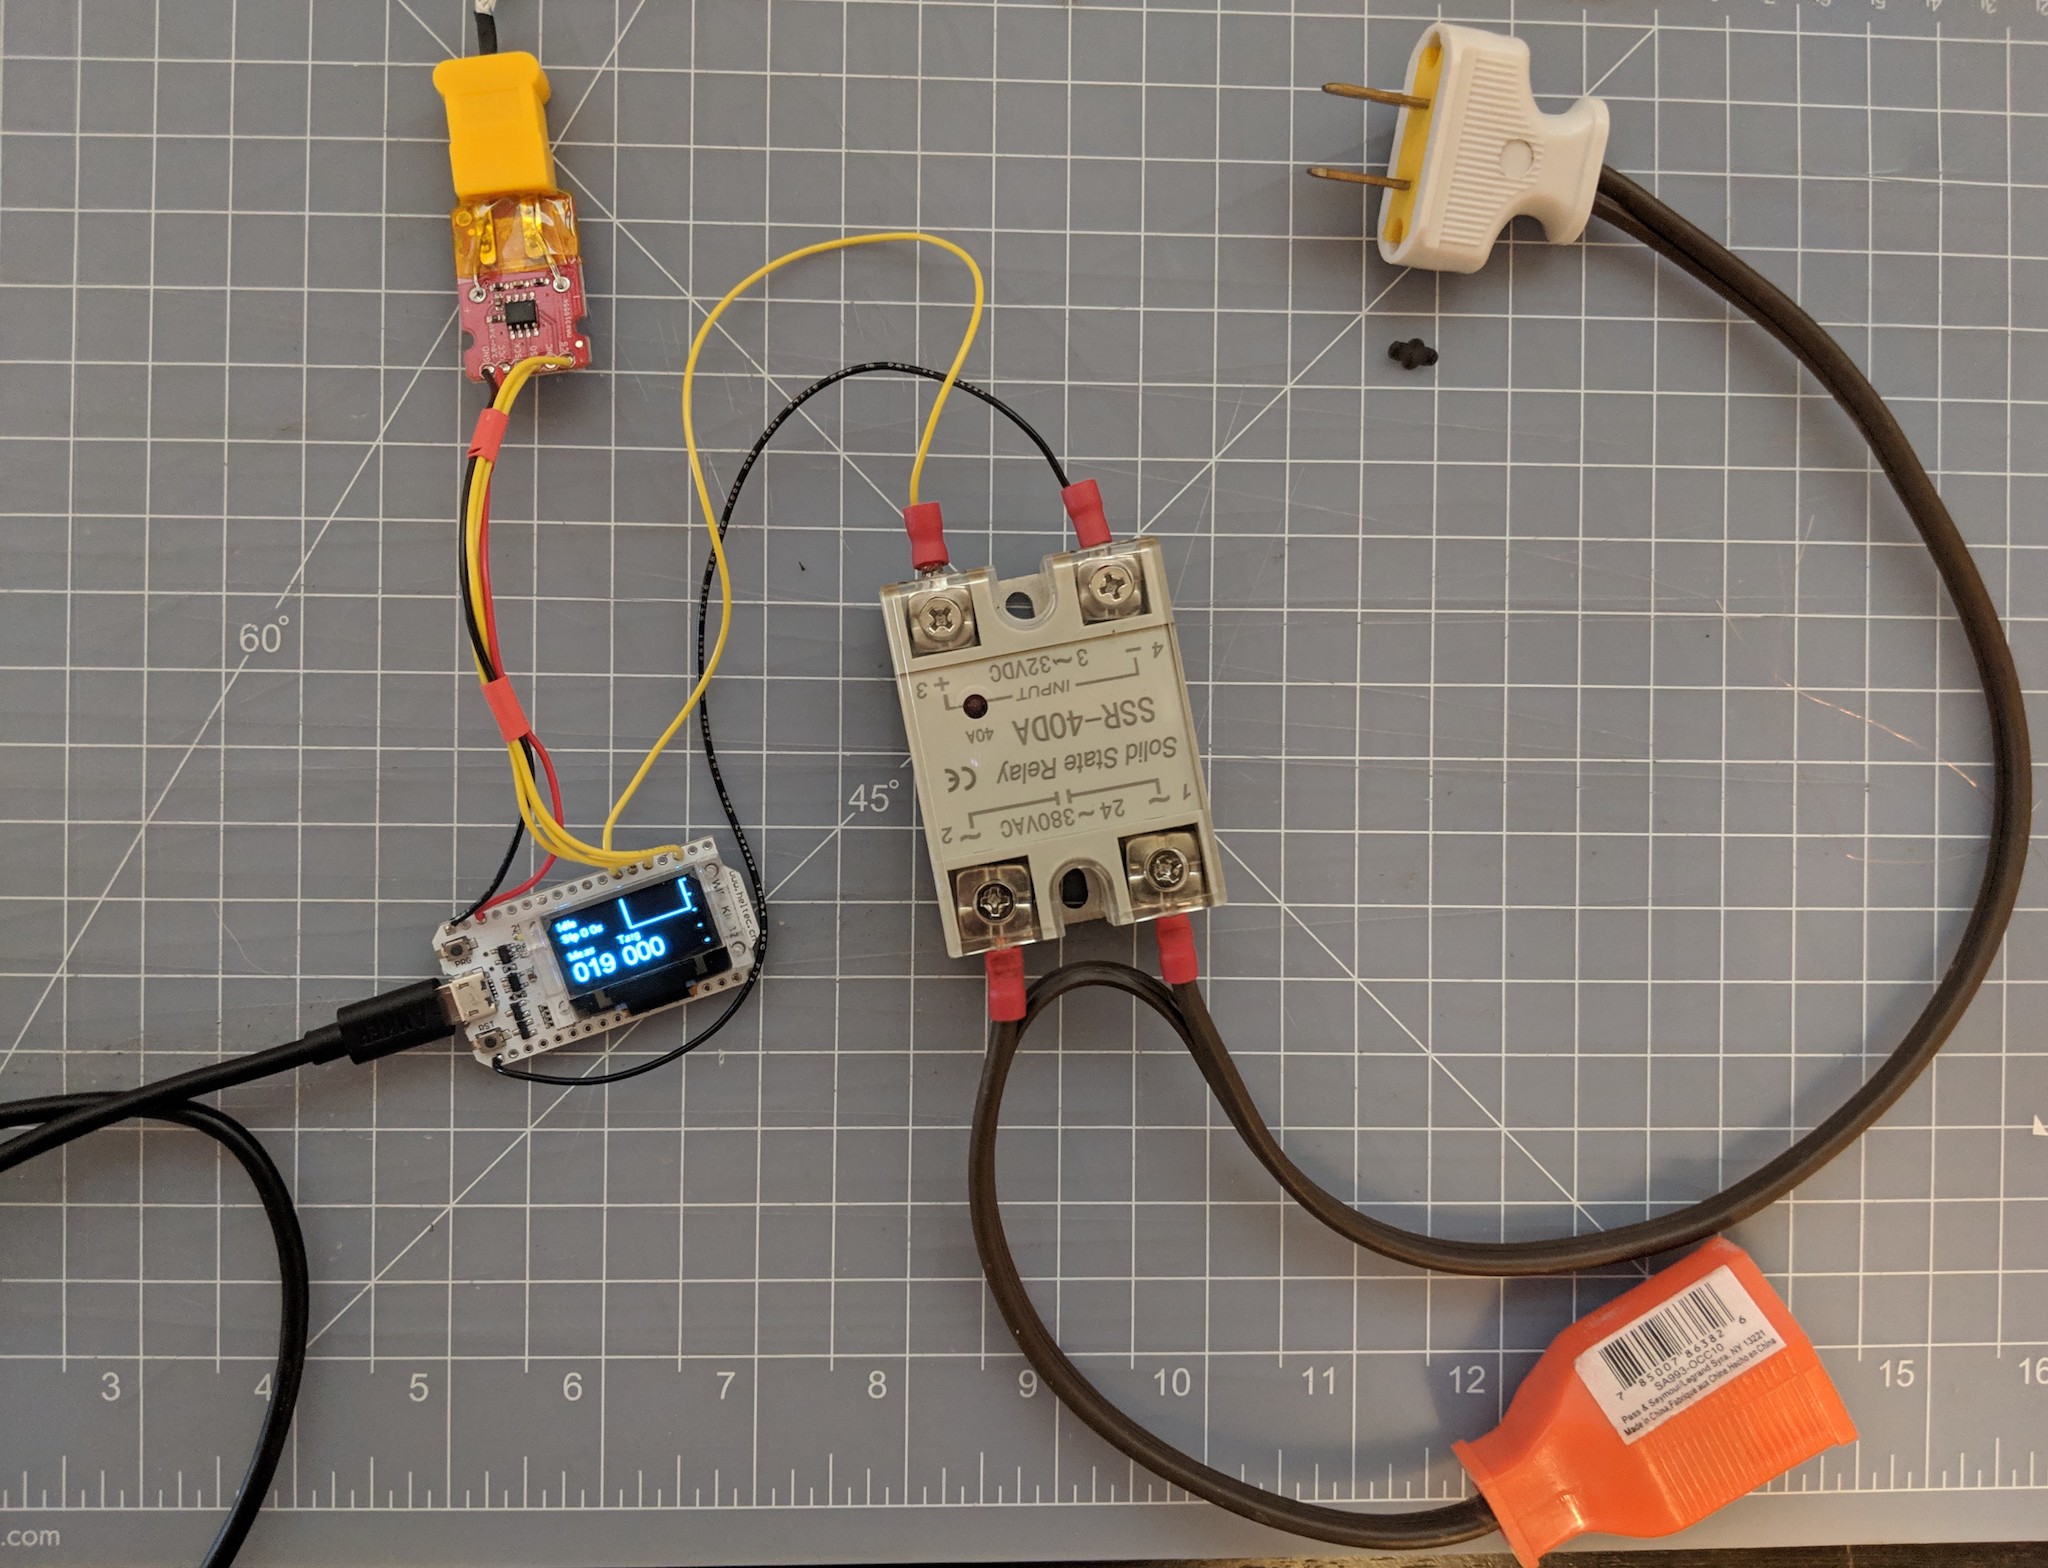
Like any feedback control system, you need some basic elements: a sensor, a controller, and an actuator to drive the state. In this case, the sensor is a temperature probe, the controller is an ESP32, and the actuator is the combination of the toaster heating elements and a switch to turn them on and off.
Bill of Materials
The sensor:
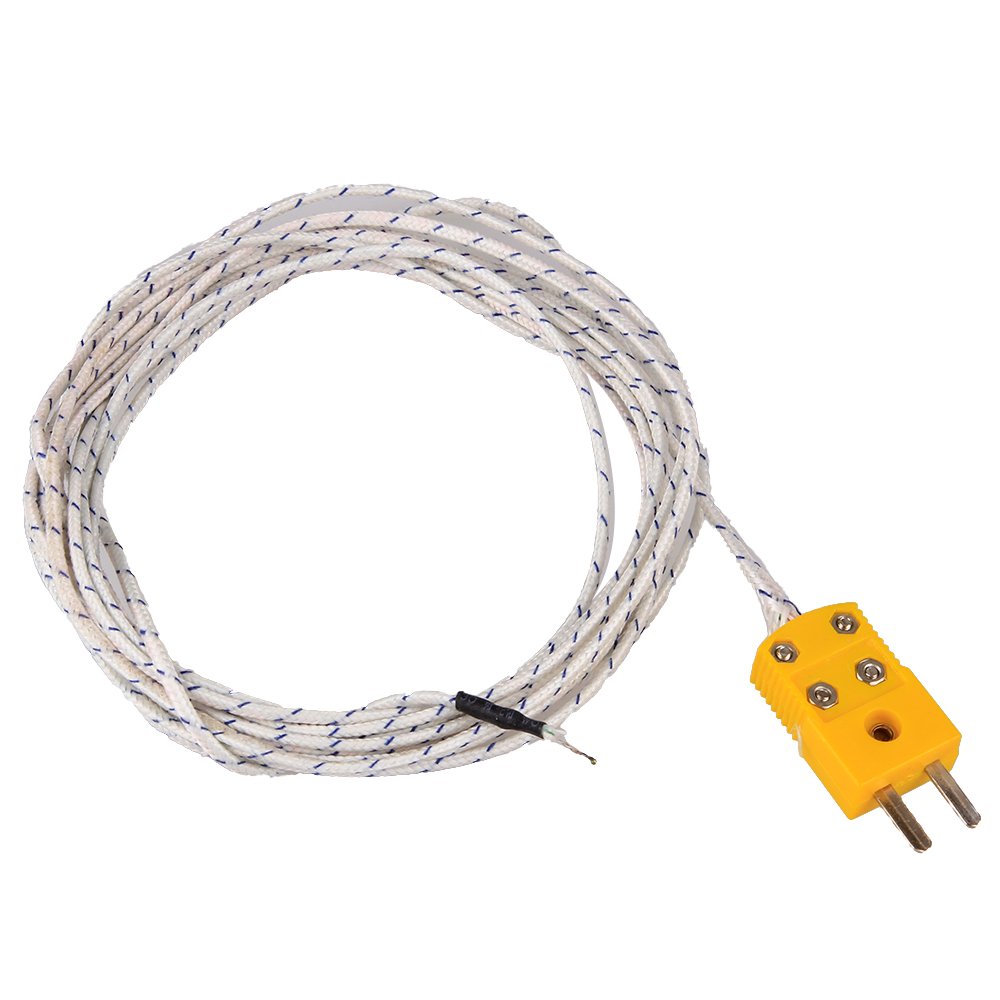
Any K-Type thermocouple, good to at least 250C. I used these, but I’m hesitant to recommend them. They are mislabeled, and are certainly not 700C probes; they’ve been doing the job but they quickly discolored from the heat and I suspect I am getting them hotter than they really should be.
The amplifier:
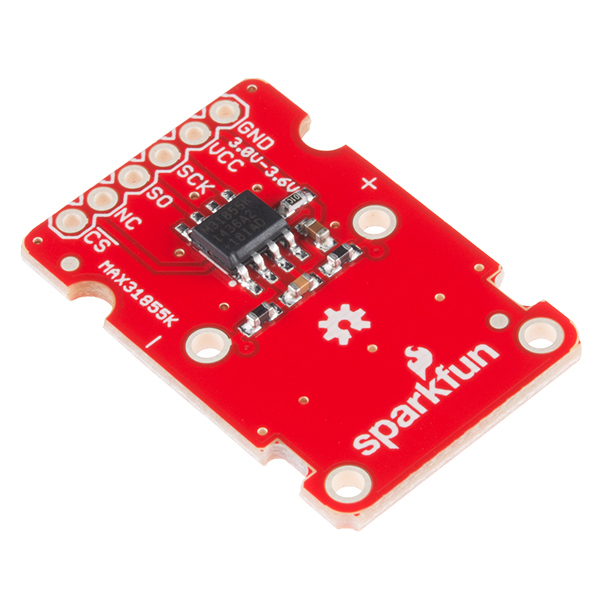
Reading the thermocouple requires an amp, and the easiest way to do this is to get a specialized amplifier with a digital interface. I used the Sparkfun MAX31855K breakout board. The MAX31855K has a simple SPI interface to read the temperature, and worked easily out-of-the-box.
The controller:
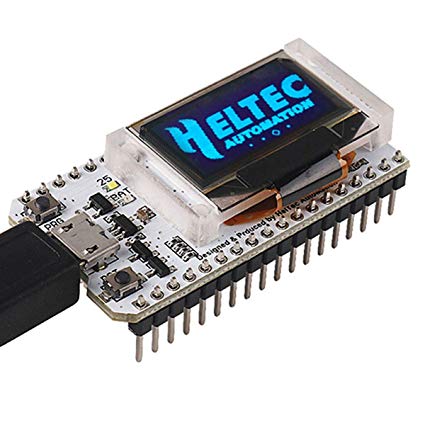
I wanted an ESP32 so I could control it via a browser and have a nice UI, but I also wanted a little screen so you could get at least some basic status information directly from the hardware. This Heltec ESP32 board fit the bill.
The switch:
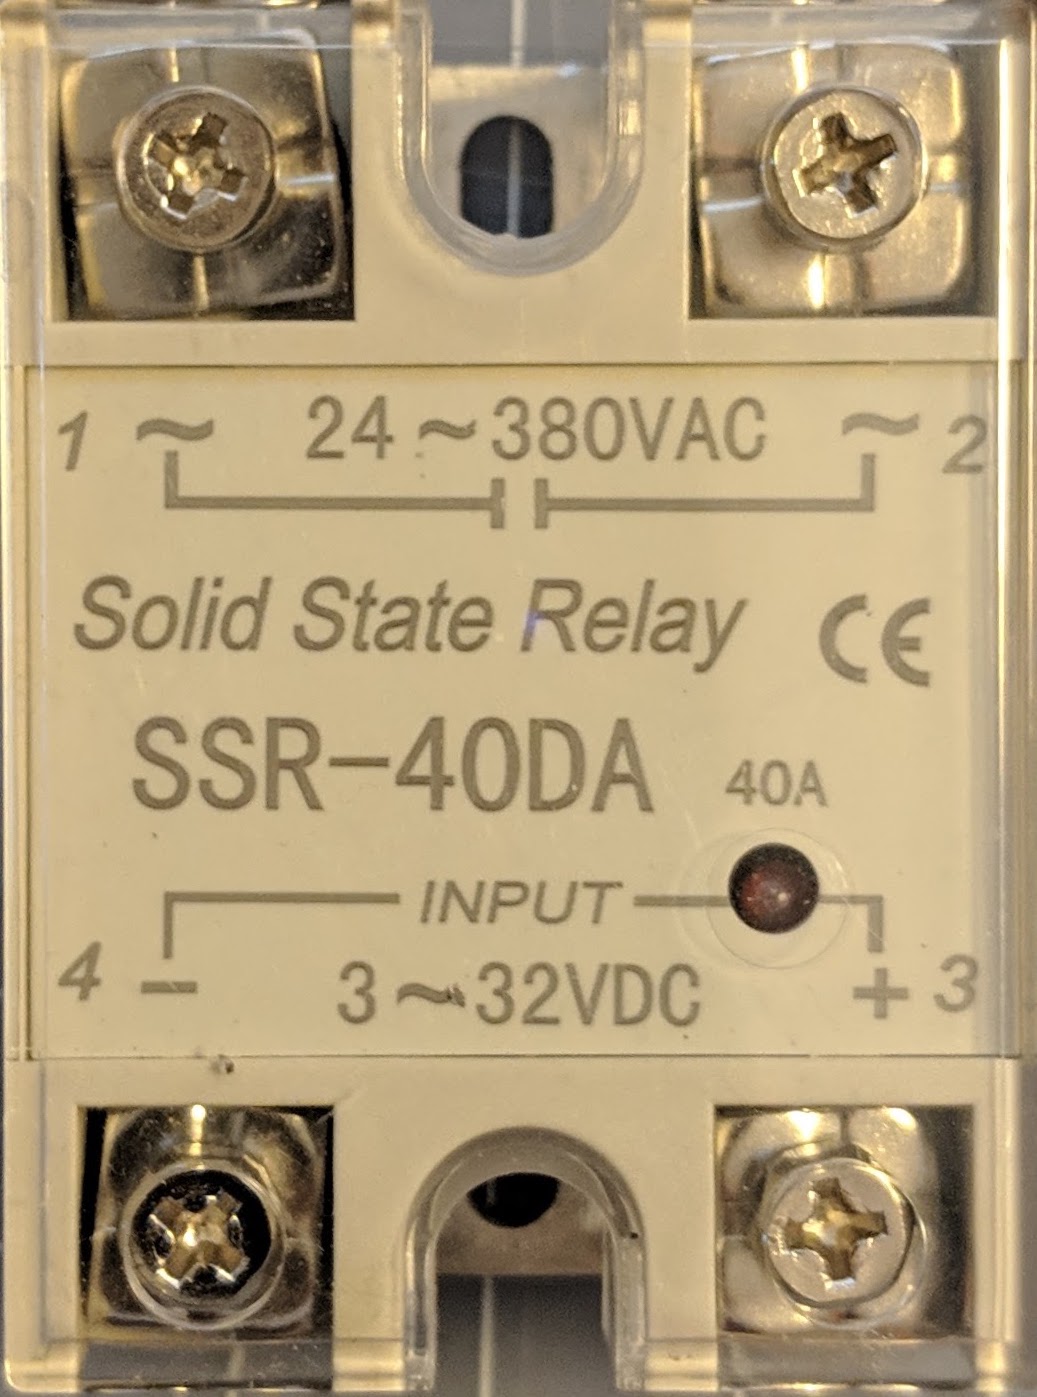
I think you can’t beat the solid state relay for switching AC loads. It’s not as loud as a relay, not prone to arcing and failure if switched too often, and it will switch at zero crossings to avoid any sudden discontinuities when switching. I used the SSR40DA which can be bought from Sparkfun, or digikey.
The toaster:
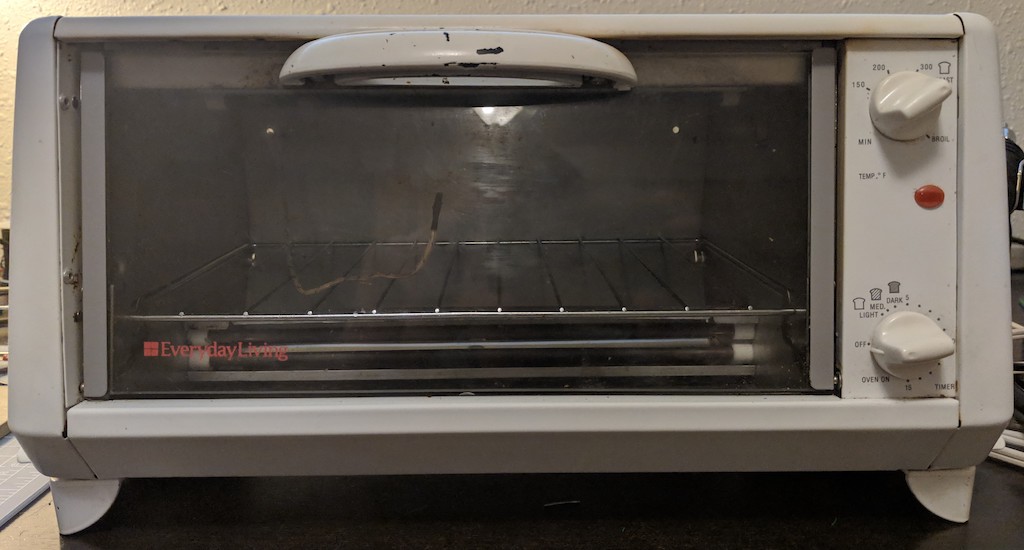
As far as I can tell, most toaster ovens will do the job. I went to a thrift shop and bought this one for $10. I looked for one with four heating elements (two on top, two on the bottom). The thermostat has just enough range that I've been getting by without bypassing it, but it does kick in after holding 245C for lead-free soldering for 20 seconds or so. I do wish it went just a little hotter, and I may have to re-wire to disable it, which is unfortunate because the thermostat provides some added safety against getting anything too hot if something goes wrong with my controller. But, I never intend to run this unattended so I can always pull the plug.
Miscellaneous:
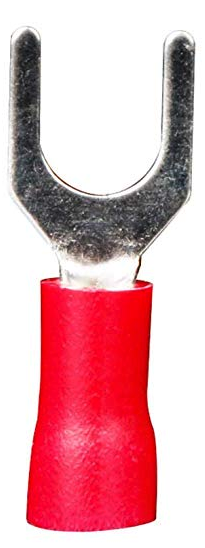
Some wiring supplies. You probably need an extension cord you can cut up to wire in the SSR. Some of those crimp-on spade terminals will make it easier to connect to the SSR. Some kapton tape is handy to tape the thermocouple onto the board (it can take the heat); it’s also a useful thing to have around for masking and securing things while doing hot-air rework.
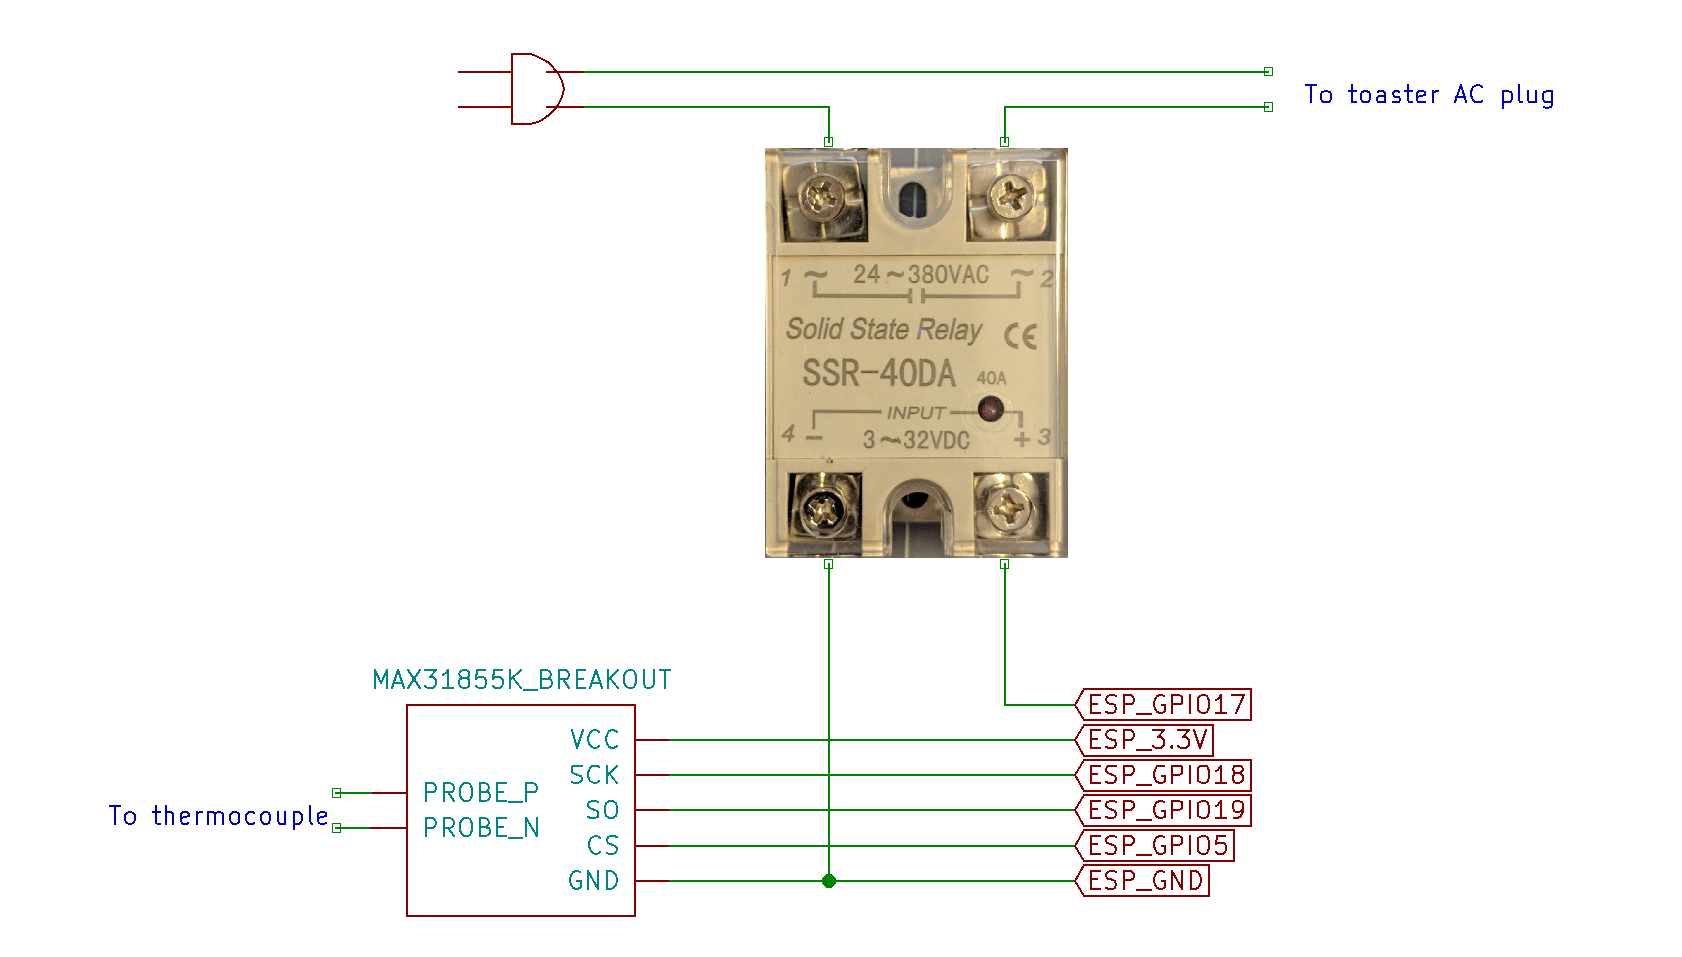
Step 2: Wire them up
Wiring is pretty simple, and only uses four of the ESP32 GPIOs. Thanks to the beefy current capabilities of the ESP32 IOs, and the relatively low control current of the solid state relay, the ESP32 IO can drive it directly.
Step 3: Programming
If you want to save some time and not write your own software from scratch feel free to start with mine and change it as you see fit -- or not. My reflow control software can be found at https://github.com/mcbridejc/esp-reflow. You’ll need the ESP-IDF library and toolchain to build and program; instructions for that can be found here: https://docs.espressif.com/projects/esp-idf/en/latest/get-started/index.html#get-started-setup-toolchain.
Once you’re setup, run make menuconfig, and provide your wifi AP settings so it can get on your
network. Probably all the other default options are fine. Then plug in the device, set the
environment variable ESPPORT to the appropriate device (for me for example, on OSX, it is
/dev/tty.SLAB_USBtoUART), and run make flash to compile and program.
The ESP will identify itself via mDNS, so you can probably connect to it by simply typing
http://reflow.local/ into your browser (assuming you are on the same LAN and your OS supports
it1). If that doesn’t work for you, you can always find the IP address it was assigned from the
console output (make monitor) or from your router.
About the software
The C++ application for ESP32 reads the temperature, drives the screen, the relay, and provides an HTTP API for controlling it. There is also a javascript application for the front-end, which is built into a "bundle" using webpack and stored to a SPIFFS partition on the flash during build. There is a second SPIFFS partition for storing the profile data so that it is non-volatile.
The toaster power is set by varying the duty cycle of a very low frequency (1Hz) PWM.
The software can store a number of different soldering "profiles". A profile is just a sequence of
steps, where each steps has a temperature, a duration, and a boolean ramp flag. If the ramp flag is
set, then the temperature will be linearly adjusted from the beginning temperature (i.e. the
temperature of the previous step, or 20C for the first step), to the temperature specified over the
timespan specified. If the ramp flag is not set, then the target temperature will be immediately set
to the specified temperature, and held for the specified duration. The duration countdown does not
begin until the temperature reaches the target. As an example, for a reflow step such as {temp:
245, duration: 40, ramp: 0}, the temperature will be raised to 245 as quickly as possible, and then
held there for 40 seconds before proceeding to the next step in the profile. This can be used, e.g.,
to ensure you get enough time at the temperature regardless of how fast the oven heats up.
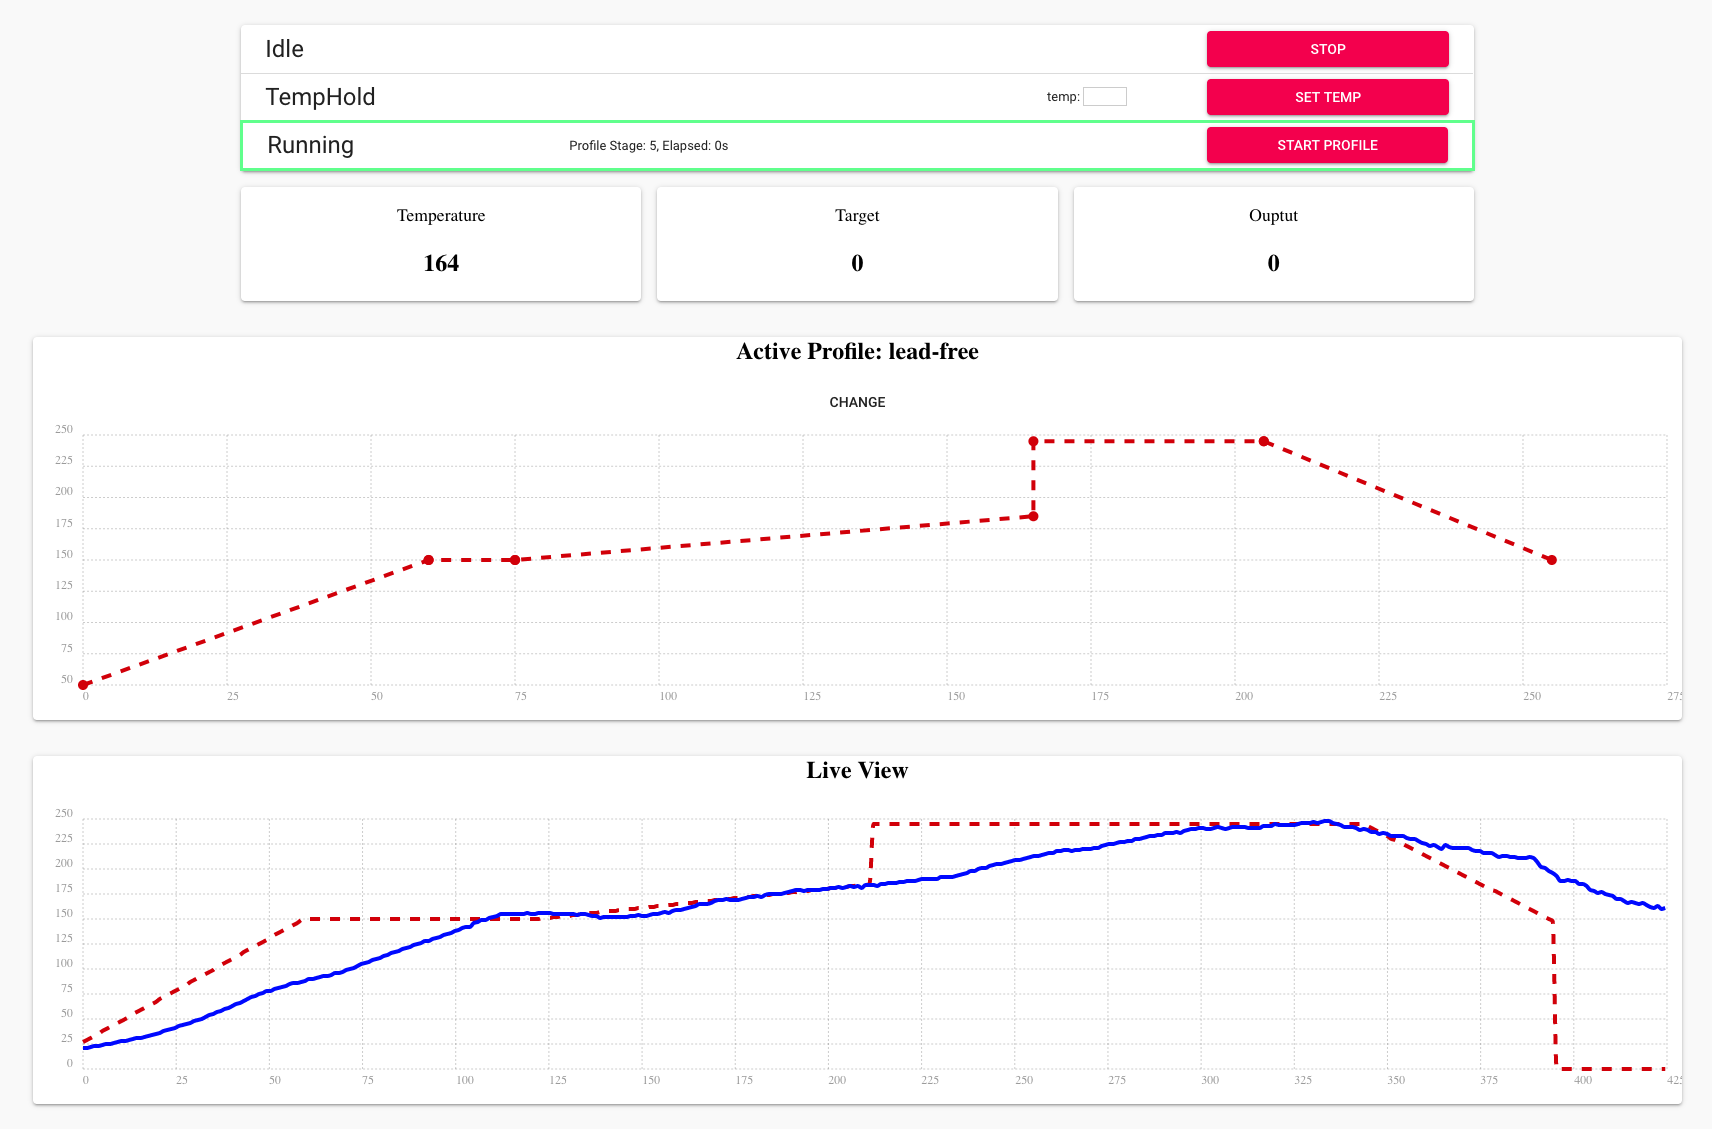
The React app for the front-end is a little unpolished, asthetically. If you do certain things wrong, such as try to create a profile with the same name as an existing profile, it will fail but give no reason for the failure. It is also doing periodic polling on a number of routes, and it would be much better to combine all of the status updates into a single long-polling route that can effectively push changes to the client. However, it does the job, so I'm not inclined to spend more time on it at the moment.
There is a live view plot that shows the last 500 samples of both target temperature and measured temperature, so you can see graphically how fast it heats, how much overshoot you get, etc. The plot data is cleared whenever a profile is started.
- Windows users may need to install the Bonjour print service for these name resolutions to work↩